A Step-by-Step Guide to Building Your Own Backyard Pond

A Step-by-Step Guide to Building Your Own Backyard Pond

Landscaping
DIY
By Dikran Seferian November 05, 2022

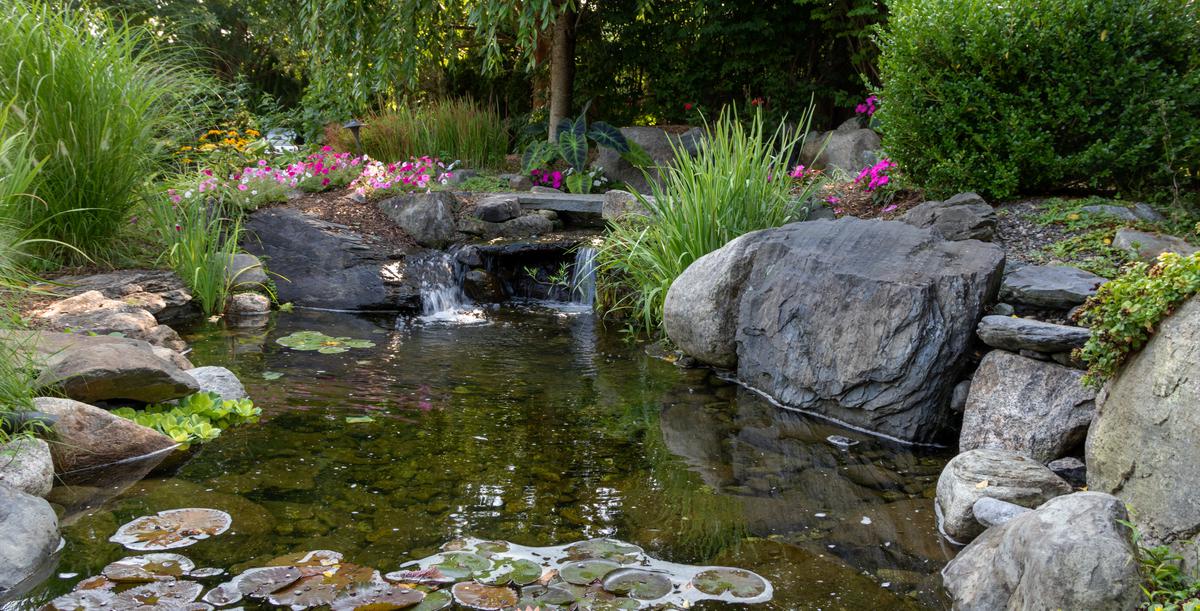
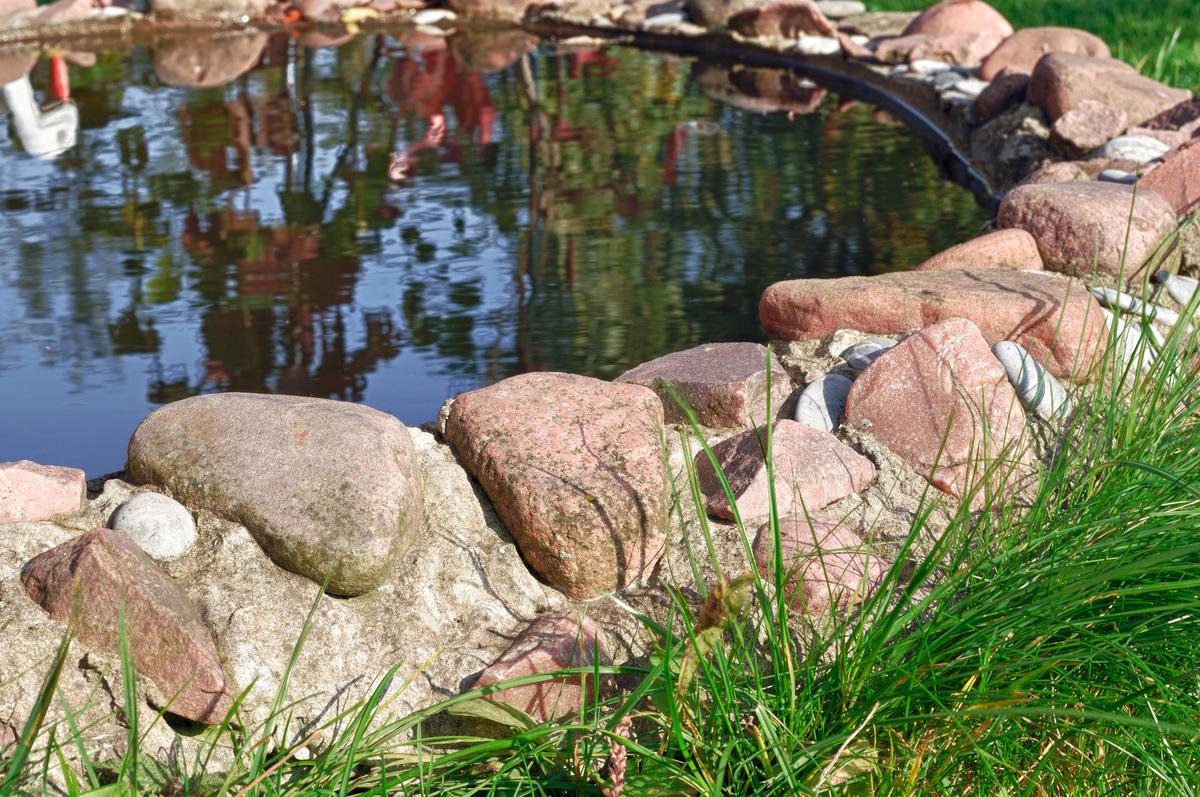
There’s nothing quite like gazing at a gentle body of water as the sunlight glimmers off the ripples. That being said, it comes as no surprise that adding a water feature in the backyard is among the most popular landscaping projects. And the best part about building a backyard pond is that it doesn’t have to break the bank. 

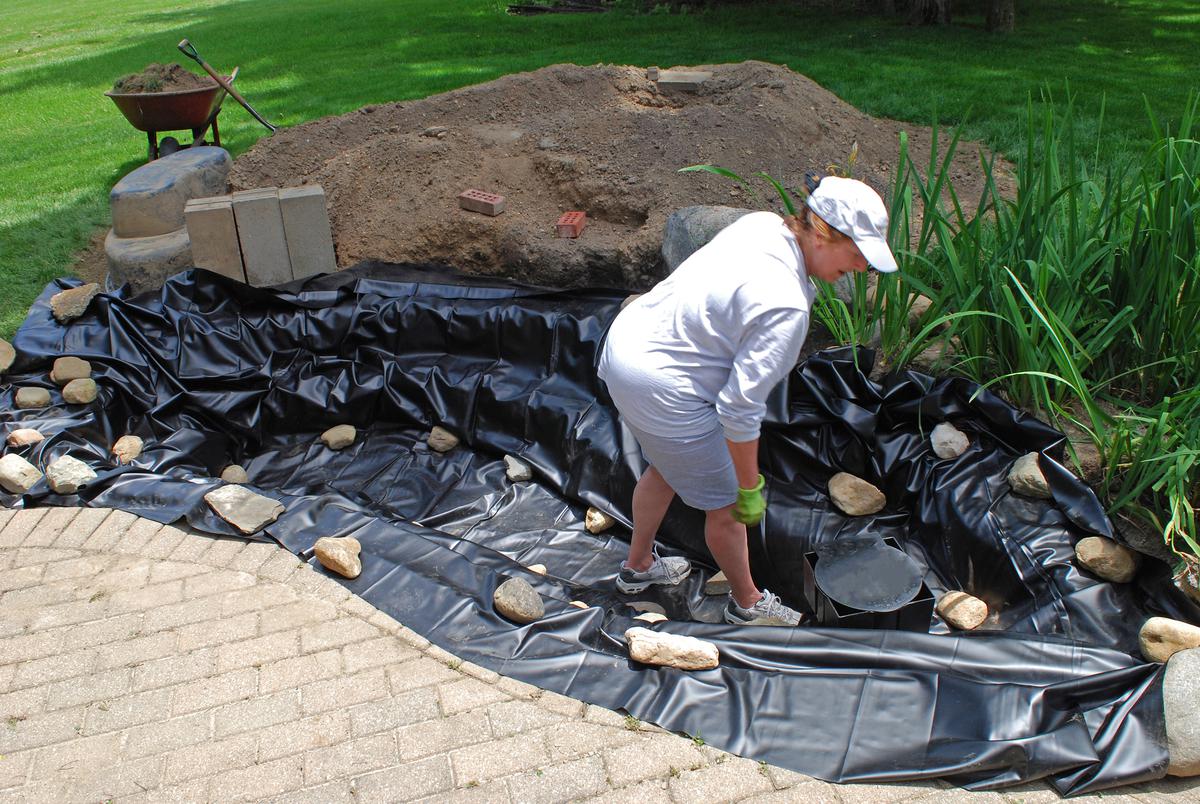
You may be wondering how to build a pond in your outdoor living space. Note that the whole process may take a few days; but if you have the time, the know-how, and the right tools, it can actually be a unique DIY project — and a great way to transform your backyard. It’s also worth mentioning that some proper planning can go a long way. And if you’re ready for the maintenance and the commitment that a pond requires, it only makes sense to go for it. 

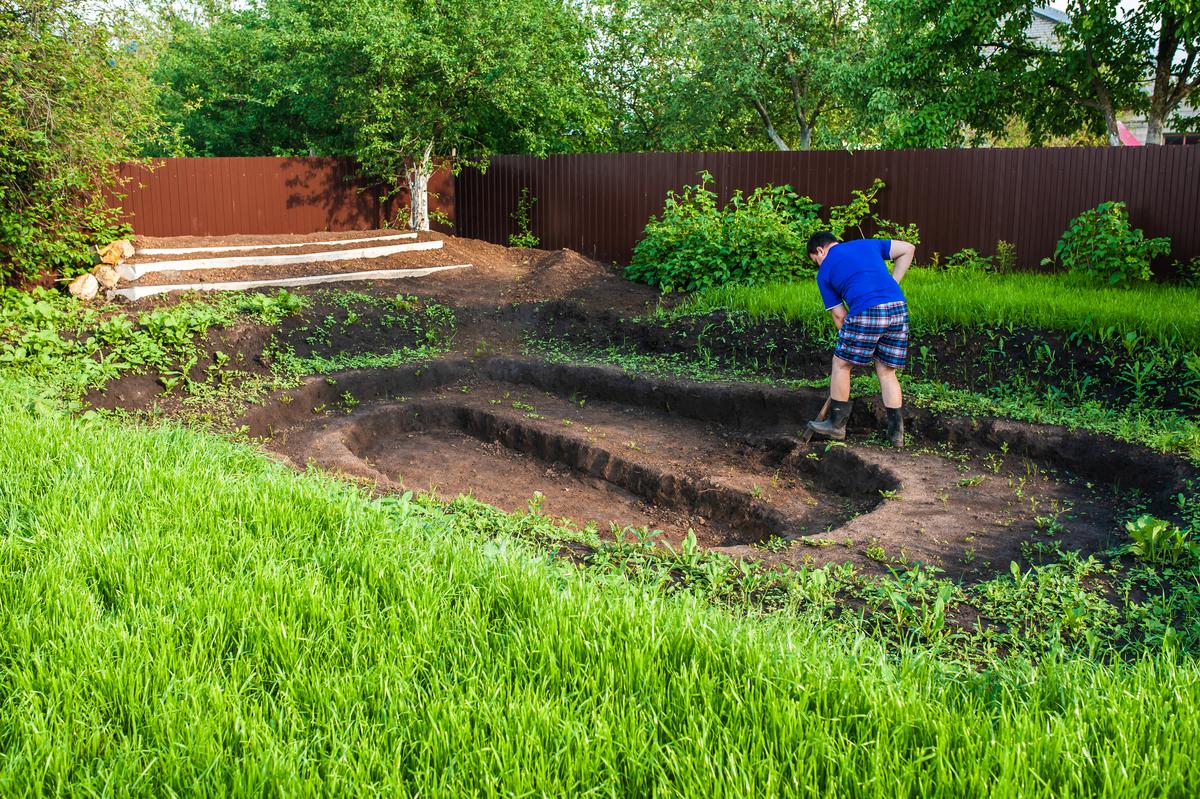
Step 1: Choose a Spot

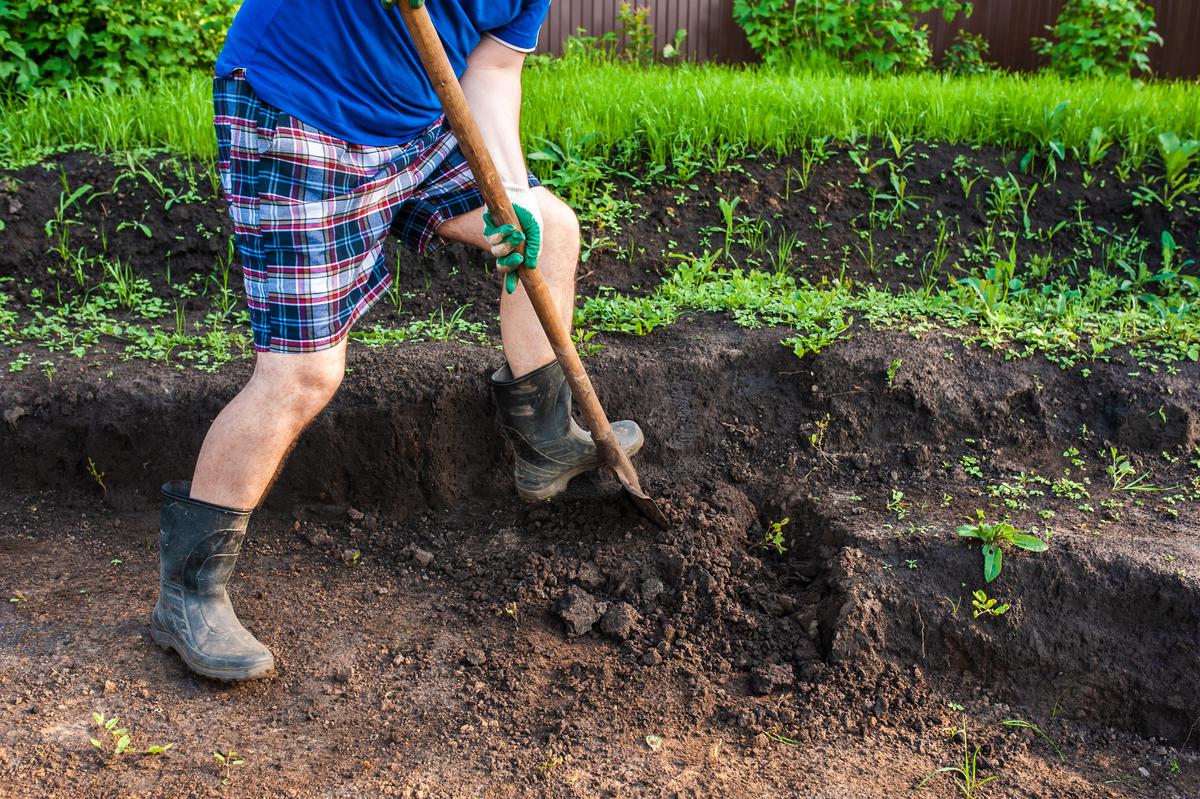
Your first course of action is to choose a location for your backyard pond. Keep in mind that an ideal spot would be where the ground is flat. A slightly steep area might also be okay if you don’t mind a little runoff ending up in your pond. Once you’ve decided on the location, you can start off by marking the perimeter and getting rid of the sod from the area. Make sure to go up to a foot beyond the borders of the pond when removing the grass. 

Step 2: Dig a Trench

Using a shovel, start by digging a trench in several layers.

Using a shovel, start by digging a trench in several layers.

The next step of building a DIY backyard pond involves digging the trench. You’ll want to make sure that the trench is a foot deep around the entire perimeter. With the trench ready, you can move on to digging out the pond itself. Consider starting in the center and working your way to the edges. It’s also a good idea to dig in several layers instead of doing so all at once. Not only would it be easier, but also helps to keep the pond level while maintaining the design.  

Needless to say, this step tends to be arduous; an extra pair of hands can therefore come in handy (pun intended). And if going big for your pond, renting an excavator for the day can get the job done faster. Make sure, however, that you know how to operate heavy machinery before using it. 

Step 3: Create a Winter Zone (Optional)

If you’re considering having fish in your backyard pond, you’ll want to create an area where they can hang around during the winter season, along with your winter plants. Ideally, the water in that zone will not freeze over when temperatures drop below freezing levels. It should be 3 feet deep and 3 feet wide, and as far away as possible from any pumps or fountains you plan on installing. Bear in mind that a pump would actually be necessary should you be adding fish to the pond. 

Step 4: Form Shelves for Plants

The shelves will essentially serve as a shallow platform for plants

The shelves will essentially serve as a shallow platform for plants

Whether you’re going for a small backyard pond or a bigger one, it would look considerably more vibrant if you adorn it with greenery. Having said that, you’ll need to form shelves for the plants you’ll be adding. Bear in mind that certain plants do better in shallow water. They’ll need a place where they can sit and grow — and won’t drown. As such, an ideal depth for the shelves would be afoot. 

Step 5: Make a Ledge

Once the shelves are ready, you’ll want to make a ledge for the pond’s edging. The edging will essentially consist of rocks that’ll serve as the outline which highlights your backyard pond’s boundaries. Make sure that the ledge is about an inch shallower than the rocks you’ll be adding later. You may also want it to be a bit more narrow. 

Choosing rocks that are higher than the terrain around it will prevent any runoff from making its way into the pond. This essentially serves as a barrier for your water feature. 

Step 6: Level the Pond

Make sure the pond is level before proceeding to the following steps.

Make sure the pond is level before proceeding to the following steps.

It is highly necessary for the pond to be level. Let’s be honest, an awkwardly lopsided pond wouldn’t be very pleasant to look at. Needless to say, it most likely won’t function as it should either. This only goes to show how critical this step is. To check if each side of the basin is equal, simply extend a board from one end to the other and place a level in the middle. You’ll want to do the same for all four sides of the pond (i.e. both length and width). Besides helping with the aesthetics, this also prevents the pond liner — which you’ll add later — from showing. 

Step 7: Remove Roots and Stones

With the basin dug, shelved, leveled, and ready for edging, there is just one step before adding the liner for the pond in your backyard. You’ll want to get rid of any stones and roots that you’ll find in the trench. These are known to damage the liner by tearing holes in them, ruining your investment as a result. 

Just to be on the safe side, consider adding a cushioning layer between the ground and the liner. A layer of sand or some newspaper, for instance, can make for an effective barrier. This means you won’t have to position the liner directly on the bare ground where sharp items can potentially tear through it. Besides serving as a barrier, a layer of sand can also seal any holes that you may have exposed by removing stones. 

Step 8: Place the Liner

To hold the liner in place, add a few heavy stones along the edges.

To hold the liner in place, add a few heavy stones along the edges.

This is where your backyard pond finally starts coming together. But first, make sure to leave the pond liner in direct sun for half an hour. The heat basically allows it to become more pliable. You may need some assistance when moving it over to the basin. To prevent damaging the liner, make sure not to drag it on the ground. It’s also important for the liner to be loosely draped as well as overlapping the pond’s edges. Position flat, heavy stones along the edges, the shelves, and the bottom of the basin, holding the liner firmly in place. 

Step 9: Add the Water

With the liner in place, you can move on to filling the pond with water. Consider hiring a water hauling service for this step in order to avoid ending up with a huge water bill — or even draining your well to the last drop. While the water fills the basin, occasionally adjust the liner so that it stays equal on all sides. You may also want to smoothen any wrinkles that would naturally form while adding the water. 

To prevent the liner from stretching out, gradually take out the stones as the water level rises (except for the ones along the boundaries). Once the basin is full, carefully cut any excess liner with a utility knife. Bear in mind that the liner should still extend from under the edging and up to 3 inches beyond the first row of edging stones. 

Step 10: Form the Edging

Lay stones along the pond’s edges in a style that reflects your personal taste.

Lay stones along the pond’s edges in a style that reflects your personal taste.

To create your backyard pond’s edging, simply position stones along the perimeter in your preferred style. Aim to use flat stones for the first edging layer; this helps to anchor the liner. Make sure you add the stones in a way that they won’t fall into the water. As you form the edging of the pond, consider driving nails every 10 to 13 inches or so in the edges of the liner. You can then get rid of the nails since the stones would be holding the liner in place.

Step 11: Install the Equipment (Optional)

Depending on your personal taste, you can add more visual interest to your water feature with a fountain. Other backyard pond ideas can include adding fauna such as fish, frogs, or turtles. A koi pond, for instance, is one of the most popular choices for water features. 

Should your pond be housing any aquatic creatures, you’ll want to add filtration to keep the water clean and habitable. This involves installing a skimmer, a filter, an aerator, and a heater as per the instructions provided by the manufacturer. The latter might not be necessary if you live in a warm climate zone. 

As for an aerator, you could also do without it if you have a fountain to create surface tension — or if the filter’s outlet makes a waterfall effect. It’s worth mentioning that surface tension helps in creating oxygen in the water, which is vital for any fauna you plan to add. Also, any equipment you install should ideally be compatible with the pond’s size. Once the pond is ready, you can finally introduce the plants to give it a more natural look. The next step is to add your pond to your outdoor maintenance checklist to always keep it looking as good as new. 

Needless to say, knowing how to make a pond can be highly rewarding. And you’ll end up with a stunning feature that maximizes outdoor fun - and you can also boast about doing it all yourself!

DS

Written by
Dikran Seferian

Written by Dikran Seferian

comments