How to Lay Vinyl Plank Flooring All by Yourself

How to Lay Vinyl Plank Flooring All by Yourself

Flooring
Additions and Remodels
Small Projects and Repairs
By Contractors.com Team June 28, 2021

Vinyl plank flooring installation is a fun DIY project that you can do yourself without having to hire a flooring contractor. Not only does it give you the bragging rights of telling everyone that you installed your own flooring, but it’s also a great way to learn the ropes when it comes to flooring installation, underlayment, and the art of how to install vinyl plank flooring in a staggered pattern. Knowing your way around flooring opens up a whole new world of possibilities, as you can then work on some outdoor flooring ideas, such as a DIY deck in the backyard. 

Vinyl plank flooring installation still has its difficulties as there are plenty of nuances you need to consider before installation. With the right motivation and handy skills, it is very much possible to lay vinyl flooring in a small room within a handful of hours.

Planning

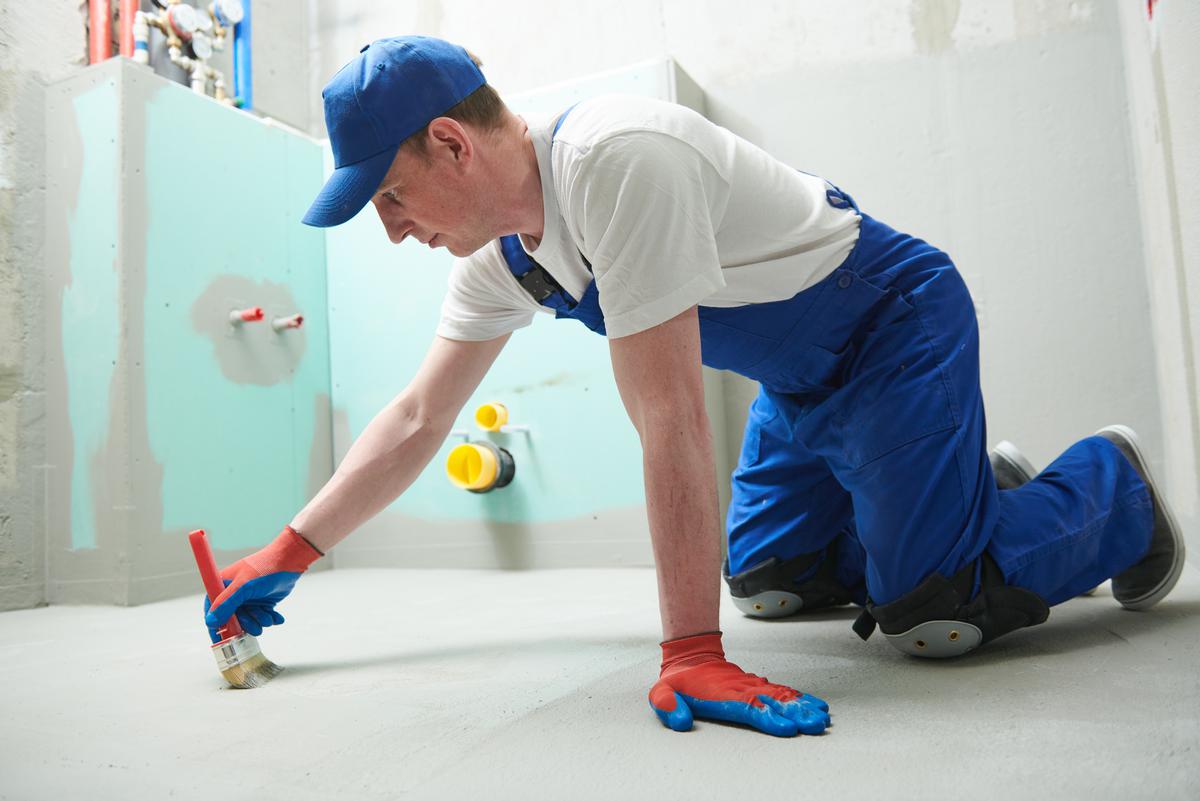
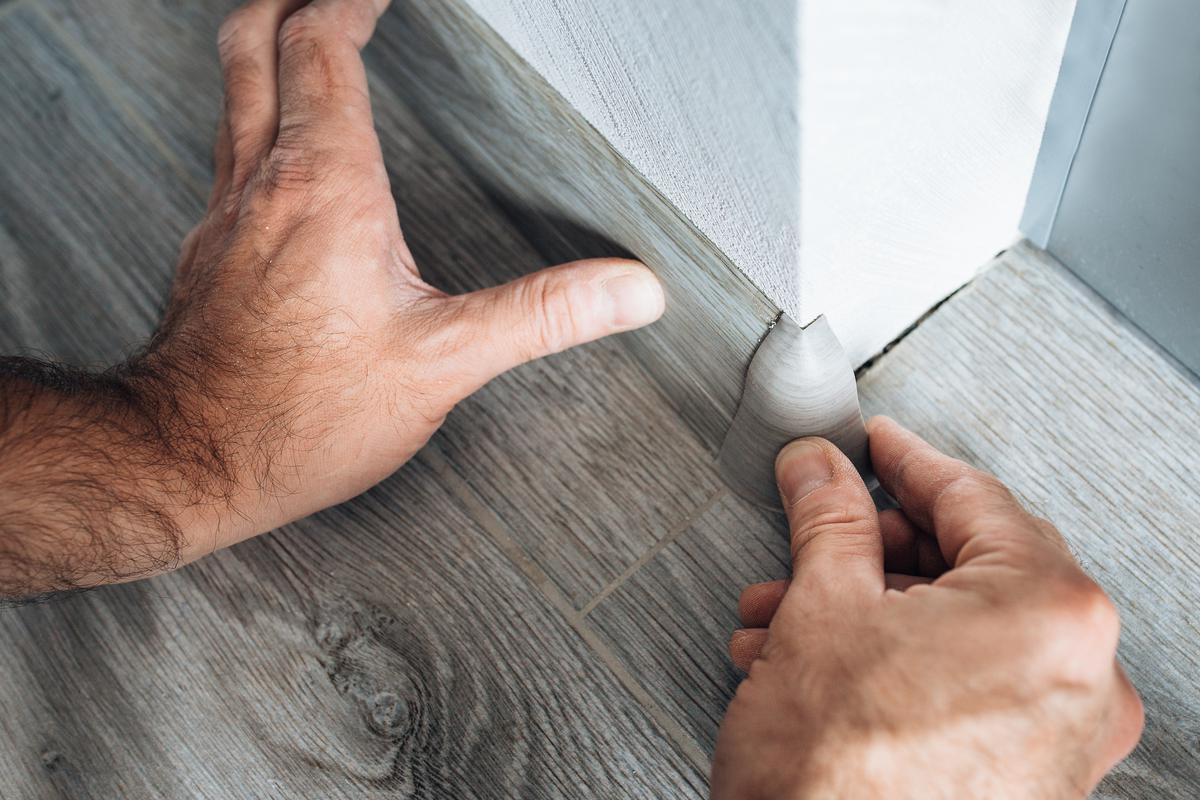
Planning encompasses all the different pre-installation measurements that should be taken before installing the flooring. The measurements have to be as accurate as possible, as any small error in your calculations could lead to an uneven surface, loose boards, and even weak plank fastening. 

Step 1. Measuring room dimensions is the best place to start. Use a tape measure and a carpenter’s corner to get the exact measurements of the wall base (including the threshold of the door). Use the corner ruler to measure the angles of the room, as, believe it or not, not all rooms are entirely straight. 

laying vinyl plank flooring

laying vinyl plank flooring

Step 2. Draw a sketch of the room in order to get a bird’s eye view of the room’s dimensions. You do not need to be an architect to make a rough sketch of the room. You can do it on a piece of paper, on a tablet, or, if you have experience with the right software, you can even make a 3D rendering of the room which you can then use to plan the layout of your floorboards.

Step 3. Inspect the subfloor to make sure there are no bumps or holes. Before renovating hard surfaces such as walls, floors, or ceilings, it is always a good idea to hire a home inspector to look through the underlying layers and identify any problems before the surface is sealed. Many new homeowners tend to forget about the subfloor layers when purchasing a new house, which often causes them more trouble later on. So, if your concrete subfloor has a bit of unevenness, consider using a patching compound to smooth them out. 

The Steps Involved In Laying Vinyl Plank Floors

The Steps Involved In Laying Vinyl Plank Floors

Installation

Modern vinyl planks are created with special grooves on their sides which make installation as easy as putting together a puzzle. There are, of course, more nuances to installing vinyl planks than that. However, your main challenge is getting the measurements right and knowing how to scatter the planks correctly. With all the materials and tools needed to install vinyl plank flooring ready to go, it’s now time to start laying down the planks.

Step 4. Remove the quarter round off of the baseboards. These are usually fastened by nails or screws, so you can either unscrew them out of place or carefully pry them off the wall.

Step 5. Trim the door jambs so that the flooring can fit under them. Use a flush-cut saw and a piece of flooring as points of reference to trim the bottom of the door jambs just enough so that the flooring will fit in snugly. Make the gap smaller than it needs to be (thinner than the width of the baseboard) and make it bigger as you use the piece of vinyl floorboard as a reference. Remember: you can always make the gap bigger, but if you cut too much you won’t be able to fix it. 

The Nuances to Laying Vinyl Plank Flooring Just Right

The Nuances to Laying Vinyl Plank Flooring Just Right

Step 6. Install the first corner plank as corners are the best place to start since you will have already begun covering two dimensions. This corner piece will be the cornerstone (or corner wood) to the rest of the flooring and will determine how well the other planks will fit. Once the plank is in place, use a rubber mallet and hit the plank along its length to fix it into place. Feel the plank with your hand as you do this to see if any part of it is still uneven or not fully nestled in.

Make Your Life Easier and Start Laying Vinyl Planks from the Corner of the Room

Make Your Life Easier and Start Laying Vinyl Planks from the Corner of the Room

Step 7. Fitting in the rest of the planks is quite simple with vinyl flooring. The planks have special locking seams on their sides which allow for easy installation. All you have to do is fit one into another like a puzzle and the rest just falls into place. Put the tapping block on the open edge of the plank and hit it with the rubber mallet so it fits tightly into the other planks. If a plank is too long, use a hand saw (or a specialized vinyl plank flooring cutter if it comes along with the package) and a utility knife to make an incision and then snap the plank to break off the extra length. For cutting down the width of the planks, it is highly recommended to use a circular saw, as the cut will be longer, making it harder to keep the cut straight. 

Using Weights to Help Lay Vinyl Floor Planks Seamlessly

Using Weights to Help Lay Vinyl Floor Planks Seamlessly

A very important tip to installing planks is to keep them varied. Consistent or uniform patterns work for brick walls, but it looks off-putting and unnatural for wooden or vinyl flooring. Keep an inconsistent pattern going when installing the various floorboard sizes and wood streak effects. To ensure that you don’t use planks of the same lengths too often, organize the planks in different piles based on their lengths right from the start. After you install a plank from one pile, pick one out from another and so on until you have naturally staggered flooring free of awkward uniformity.

Step 8. Reinstall the quarter round or baseboards once all the planks are in place. Since vinyl planks are a type of floating floor (since they are not nailed or glued to the subfloor below), you have to nail the quarter rounds and baseboards into the walls as opposed to the floor. The same rule applies to those using screws.

Installing the Baseboards As One of the Final Steps of Vinyl Plank Flooring

Installing the Baseboards As One of the Final Steps of Vinyl Plank Flooring

Step 9. Inspect across the floor to see if there are any uneven bumps or planks that have not quite settled into place. Use the rubber mallet to further flatten them and even out the floor. 

What to Avoid

  1. Always cut less than is needed and work your way up as you go. This goes for the vinyl planks, the door jambs, baseboards, and quarter rounds as well. If you cut away too much, there is no way for you to restore it. 

  2. When fixing the planks into place without a rubber mallet, you can use a hammer or a wooden mallet instead, but remember to be extra careful. As high-end as vinyl plank flooring can get in terms of material, it can still chip or crack very easily if you are too forceful.

  3. Be careful when cleaning the vinyl plank flooring. While some contractors give a strict “no” to the question “can you use a steam mop on vinyl plank floor?”, there are also some who claim that there is nothing wrong with it. To be on the safe side, talk to a flooring expert to see what they will recommend for your vinyl plank flooring specifically.

  4. Avoid nailing anything into vinyl floors. While vinyl is quite durable, it is still susceptible to cracks and breaking.

  5. Don’t skimp on the underlayment. Vinyl floor installation gives you the perfect opportunity to inspect your subflooring and underlayment, which is what waterproofs the floor. If the underlayment is not in a good state, get it replaced before installing the new flooring.

Written by
Contractors.com Team

Written by Contractors.com Team

Welcome to the Contractors.com Team, a group of passionate individuals dedicated to helping homeowners achieve their dream home through the best-in-class service providers and inspiring content.


We believe that every homeowner deserves to have a home that they love, and we're committed to making that a reality. Whether you're looking to remodel your kitchen, renovate your bathroom, or build your dream home from scratch, we've got you covered.


When it comes to creating content, we take a multi-faceted approach. We gather insider tips from experts in the home service industry, and do our own thorough research to write informative and engaging articles that are tailored to our readers' needs. At the same time, we harness the power of A.I. and GPT-3 technologies to generate titles, headlines, and even entire articles that are optimized for SEO and designed to provide value to our readers.


We're committed to providing the best possible service to our readers, and we're always looking for ways to improve. Whether you're a homeowner looking for inspiration or a service provider looking to join our network, we're here to help you achieve your goals.

comments