How to Build Your Own DIY Pizza Oven

How to Build Your Own DIY Pizza Oven

DIY
Handyman
Outdoor Additions
By Dikran Seferian April 04, 2024

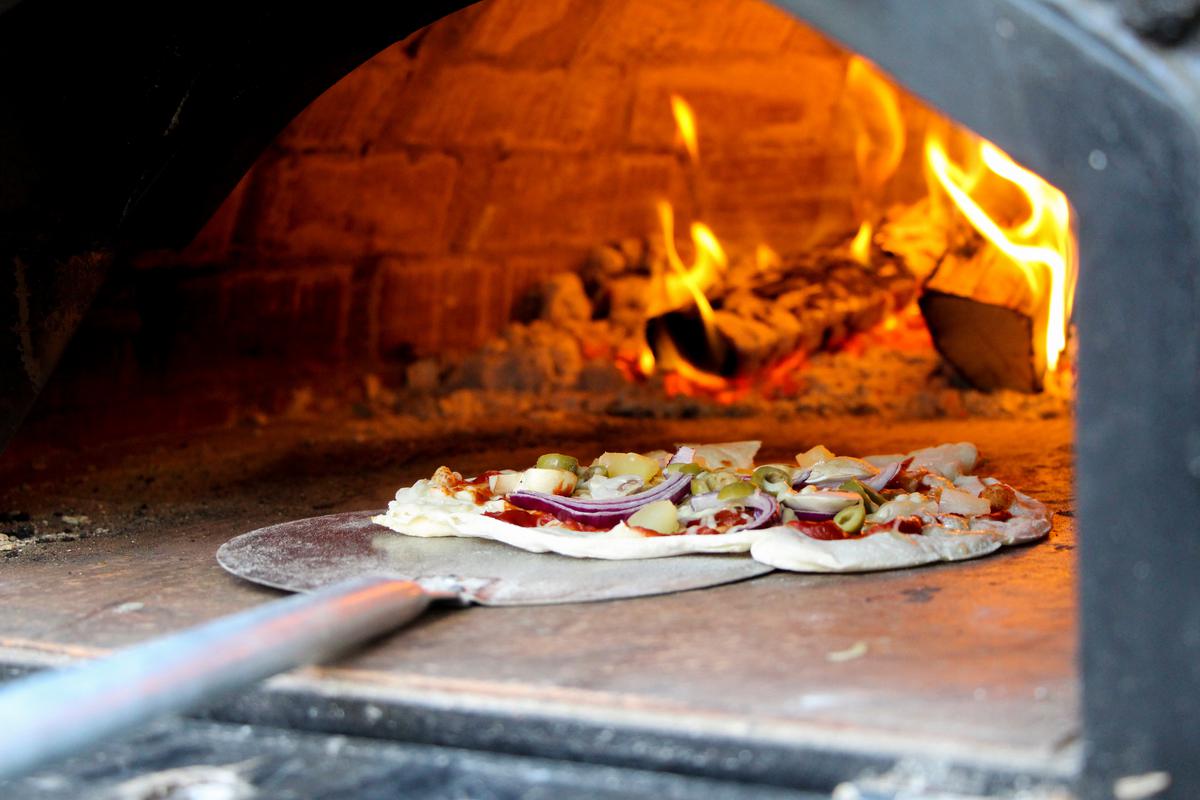
Who doesn’t love homemade pizza? Concocting your own recipe and eagerly waiting for your culinary masterpiece to be ready is undeniably fun. But it doesn’t beat baking one in an outdoor pizza oven. It’s authentic, and the smoky flavor you get is simply unmatched. While you can go ahead and buy a pizza oven, why not take the concept of homemade pizza to another level by building the oven yourself? 

While it may seem like a huge undertaking, building a DIY pizza oven is pretty straightforward. Plus, it can make for a fun outdoor project with an end result that’s definitely worthwhile—one that you’ll be enjoying for years to come.

How Much Does It Cost to Build a Pizza Oven?

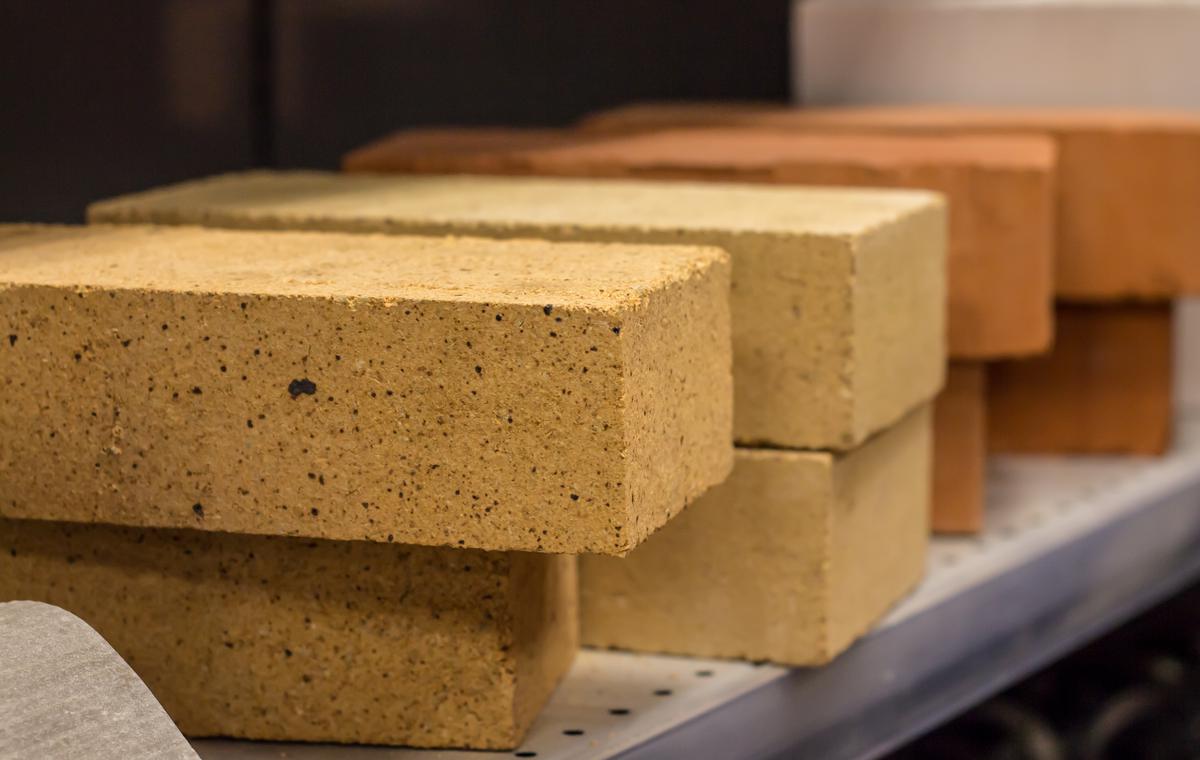
If you plan on building a brick pizza oven yourself, the price tag will largely depend on the materials you use. A 36-inch diameter oven, for instance, may cost anywhere from $500 to $2,000.

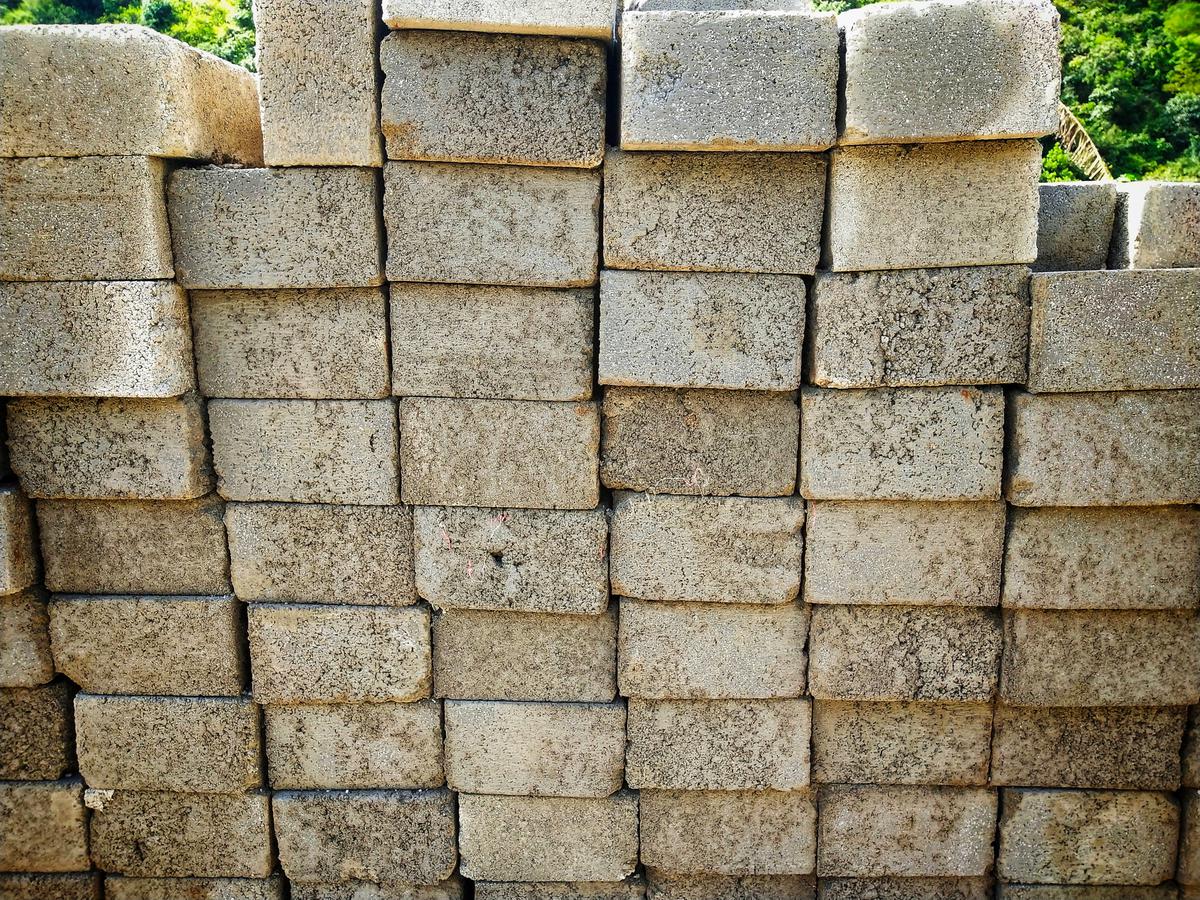
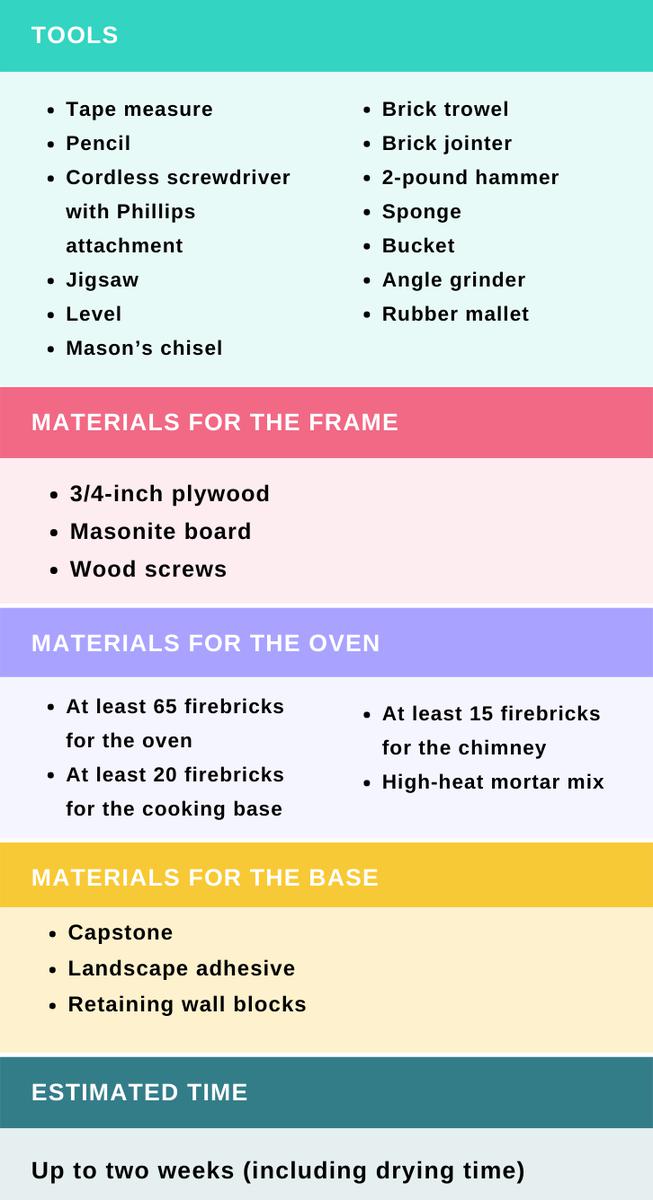
For a DIY pizza oven, you may need anywhere from 100 to 200 firebricks, each weighing about 8 pounds, for a total of 1,600 pounds. That being said, you may also need to rent a truck capable of carrying the bricks, which will add up to $50 per day to the overall costs. However, the end result—and the endless number of pizzas you’ll be making—is definitely worth every penny.

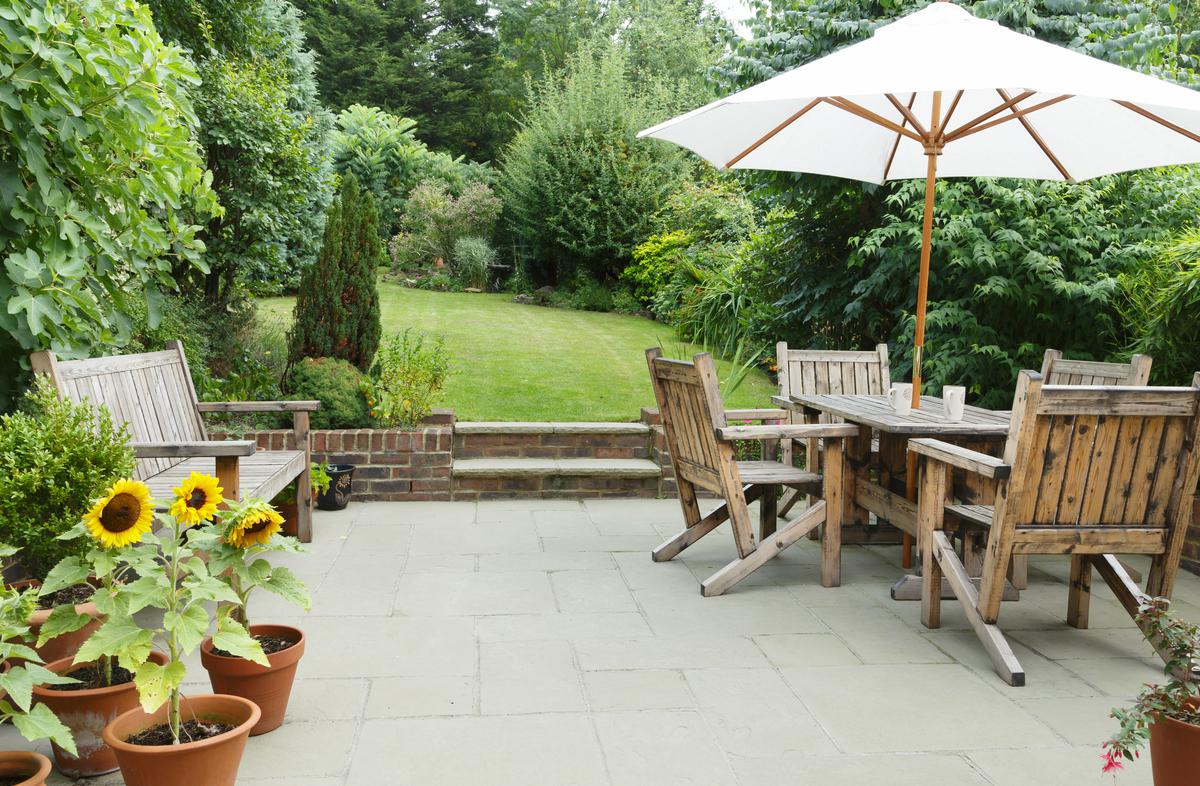
It’s also worth mentioning that building a pizza oven in your backyard is more practical and less expensive than building one in your kitchen. With all the extra spacing and pipework, adding an indoor brick oven is basically a minor construction project in itself.

The cost of building a pizza oven depends on the size and design.

The cost of building a pizza oven depends on the size and design.

Can You Build a Pizza Oven With Normal Bricks?

When you want to build a pizza oven, a common question that might occur to you is whether you can use normal bricks. The short answer is yes. As long as the bricks are composed of clay and are kiln-fired, such as red clay bricks, it’s perfectly fine to use them. However, concrete brick is one type of brick to avoid at all costs. While clay bricks are known to withstand high heat levels, concrete ones tend to be brittle and will crack under heat; you probably don’t want pieces of concrete as a pizza topping.

While they're a common material in construction, concrete blocks are unsuitable for pizza ovens.

While they're a common material in construction, concrete blocks are unsuitable for pizza ovens.

What Is the Best Material to Build a Pizza Oven?

The type of brick you use is important for not only the levels of heat it can withstand but also the longevity of the oven. Firebrick is the best building material for an outdoor wood-fired pizza oven, but red clay bricks will also do just fine.

Firebricks are built to handle high levels of heat. In addition to wood-fired ovens, they are the material of choice for fireplaces and industrial furnaces. Firebricks naturally have a white color and are composed of a type of fireclay. The main difference is that clay contains alumina and silica, and the ingredients that go into producing it allow the material to resist high temperatures. 

You can find firebricks in a range of shapes, all of which have a solid core, as they are meant for high heat resistance. Firebricks are also the go-to choice for outdoor fire pits and fireplaces.

Firebricks are the best choice of material for building a pizza oven.

Firebricks are the best choice of material for building a pizza oven.

Red clay bricks are the traditional building materials for brick houses. While you can find them in a variety of shapes, they’re typically red in color and make use of different ingredients. Red clay bricks are also available in both solid and hollow cores. If the ones you buy are hollow-cored, make sure to fill them up with mortar before laying them.

As heat tolerant as they may be, however, they are not suitable for long use. Having said that, you may want to avoid this material unless you don’t plan on using your homemade pizza oven more than a few times per year. 

How Do You Build a Wood-Fired Pizza Oven?

Step 1: Choose a Suitable Location for Your Pizza Oven 

Your first action should be picking an ideal spot for your brick pizza oven. Bear in mind that this is a permanent build, so it’s important to plan carefully. You may want the location to be easy to access from the seating area and for it to have a minimum clearance of 3 feet all around. Another thing to make sure of is that there aren’t any combustible materials nearby and that the surface is level and sturdy. Not considering these factors will result in a very awkward outdoor living space mistake.

Make sure to plan the location of your outdoor pizza oven carefully.

Make sure to plan the location of your outdoor pizza oven carefully.

Step 2: Determine the Design and Measure Accordingly

Once you’ve settled on a spot for your DIY pizza oven, you can move on to choosing its design. You can build the oven in many different shapes and sizes. It all comes down to the location, your personal preference, and, of course, your DIY skills.

Measure a distance of at least 3 feet from your house and work your way from there. That should give you a safe enough distance to build your home pizza oven.

Step 3: Construct the Base

Unless you have a concrete table no smaller than 3 feet by 3 feet, you’ll need a base to build the oven on. You can either buy a concrete base or build one yourself. For a 36-inch oven, for instance, the ideal dimensions are 3 feet by 3 feet whereas a 48-inch unit would require a base of 4 feet by 4 feet. Consider going for a dry run by positioning the initial row just to see how it looks. Note that you may use concrete blocks for the base but not the actual DIY pizza oven.

Depending on the exact size of the base, you may need to split some of the blocks for them to fit the oven’s design. Using an angle grinder, score the blocks about ¼ inches on each side and finish off using a chisel.

Lay down the initial row of blocks, making sure they’re level and square before building on top of them. Apply two parallel lines of landscape adhesive along the blocks and lay the next row on top. Repeat the process until you have the desired height, checking for plumb and level along the way. Next, run another two lines of adhesive on the top layer and position the capstone over it. That is where you’ll be building your brick pizza oven.

Step 4: Build the Frame

The first step of constructing the oven itself is to build the frame on which you’ll be laying the bricks. Cut three semicircular ribs out of the plywood according to the size you want the oven to be. Position the ribs on the masonry board so that they’re equally spaced. Bend the board over the curvature of the ribs, screwing it down with the cordless screwdriver.

Step 5: Position the Frame and Start Building

With the frame ready, you can get started with the building process. Place the frame in the With the frame ready, you can get started with the building process. Place the frame in the center of the capstone and lay the first row of bricks along both sides. Make sure to soak the bricks in water for at least 10 minutes before you apply the mortar.

You’ll want to use the wider side of the brick jointer when smoothing out the mortar between the capstone and the bricks. Make sure the mortar you’re using is heat-resistant because your brick pizza oven will reach high temperatures.

Mortar a row of bricks on each side of the oven frame.

Mortar a row of bricks on each side of the oven frame.

Step 6: Creating the Brick Framework

The next step involves removing the frame and using the brick trowel to mortar bricks on both ends of the parallel rows. This essentially forms the brick framework. Wipe the center of the framework using a sponge and water to prepare for laying the cooking surface brick in a diagonal fashion. Make sure to only mortar the base of these bricks and not the sides, and position them as close to each other as possible. 

Step 7: Fill Up the Remaining Spaces

By diagonally positioning the bricks for the DIY pizza oven’s cooking surface, you’ll end up with empty spaces to fill on the sides. Measure the bricks you’ll cut to fill those spaces and mark them with a pencil. Score the bricks along the pencil line with the mason’s chisel and the 2-pound hammer. Repeat this step on the reverse side of the brick, alternating between sides until it splits.

Step 8: Lay the Next Row of Bricks

Place the oven frame back on top of the cooking base and mortar the next layer of bricks against the frame. Make sure this row of bricks is flush with the frame's sides, so even them out using the mallet as you go. Following the frame’s curve, stagger three more layers of bricks and repeat the process on the other side of the frame. Lay another three layers on each side and leave two unfinished rows above.

Step 9: Form the Chimney

Place four bricks for the base of the chimney around half a brick’s length from the front of the home pizza oven. Lay the final row of bricks behind the chimney and in front of it. Next, mortar three more layers of bricks for the oven’s chimney, making sure to place them at a 90-degree angle for a perfect square. 

Step 10: Seal the Back

Close up the backside of your DIY pizza oven by mortaring bricks to the top. While working along the curve, you’ll need to fill up the empty spaces by cutting some bricks with the chisel. 

Step 11: Let the Oven Dry

Once the oven is fully dry, you can move on to the first firing.

Once the oven is fully dry, you can move on to the first firing.

After 48 hours, carefully remove the frame and allow the oven to dry for another four days. Then, you can move on to the first firing of your homemade pizza oven. Note that you must wait a week after the first firing before doing any actual baking. Light one piece of firewood on the first day and let it burn through. 

On the second day, burn two pieces, and so on until the seventh day. An ideal spot to light the firewood is on one of the back corners of the cooking surface. Make sure to never make use of any chemical firelighters in your pizza oven. You may also want to clean the cooking surface as part of your outdoor maintenance.

What You'll Need

None

DS

Written by
Dikran Seferian

Written by Dikran Seferian

comments