Quick Tips on How to Repair Drywall and Gypsum Board

Quick Tips on How to Repair Drywall and Gypsum Board

Drywall
By Dikran Seferian September 25, 2022

Drywall is known to be a very sturdy element in the home. But even so, it does need its fair share of care and attention. Neglecting to be careful around drywall may cause it to actually break or crack, and in certain cases, it can be punctured. Anyone with reckless young children, pets, or overactive teenagers can probably tell you a story of how their drywall got punctured by siblings wrestling with each other or playing with the dog. 

Once the damage is done, you may be looking up how to fix a hole in the wall. The exact process mainly depends on the scope of the damage. Patching a small puncture, for instance, involves a different method than fixing a larger hole. And while you can consider the services of drywall patching specialists in your area, you can also try and repair the drywall yourself. 

Patching Small Holes in the Drywall

Self-adhesive mesh patches are ideal for fixing small holes in the drywall.

Self-adhesive mesh patches are ideal for fixing small holes in the drywall.

In the case of small holes in the drywall such as those caused by doorknobs, self-adhesive mesh patches can come in handy. You can find these at your local hardware store. 

Apply the Self-Adhesive Patch

The self-adhesive mesh patch method is a pretty straightforward way to repair drywall. The first step involves applying the patch onto the small hole. 

Cover With Compound

Using a drywall knife, apply spackling or lightweight joint compound over the patch in a crisscross fashion. Make sure to feather the edges of the compound so that it blends with the surrounding wall. To do so, simply apply more pressure on the knife as you work your way to the patch’s outer edges, thinning the compound in the process. 

Go for a Second Coat if Needed

In some cases, the patch may need a second coat of compound. Once the first coat is dry, apply more compound in the same manner. 

Repairing Medium Holes in the Drywall

Medium-sized holes often require a different method of drywall repair known as the California patch.

Medium-sized holes often require a different method of drywall repair known as the California patch.

Drywall repair — such as Sheetrock repair — for holes that are up to 6 inches wide often involves making use of the California patch. This method is also referred to as the butterfly patch.

Cut a Patch of Drywall

Cut a square patch of drywall 2 inches wider than the affected area. Make sure to take all the safety precautions when cutting the drywall. This includes wearing a dust mask, work gloves, and eye protection. 

Prepare the Patch

Using a utility knife, score the back of the drywall patch around 1 inch from each side. Carefully snap the gypsum off from the margins, making sure that the paper backing remains intact. 

Trace Around the Gypsum Square

The next step of gypsum repair for medium damage involves holding the patch over the hole and tracing around the square with a pencil. You’ll want to avoid including the paper section in the transfer. Using a drywall saw, carefully cut out the square that you traced on the wall. Make sure to check for electrical wires in the hole before cutting; you can typically find them fastened to studs.

Apply the Compound 

Coat the back of the patch’s paper section with the joint compound. Then, insert the gypsum square into the hole and press the compound-covered paper margins on the outer edges of the hole. 

Coat the Patch

Apply joint compound onto the whole patch until the outline is concealed. Make sure to feather the edges so that it blends with the wall. If necessary, apply a second coat of compound after the first coat dries. 

Fixing Large Holes in the Drywall

Repairing a larger hole is slightly more complex than patching smaller damage.

Repairing a larger hole is slightly more complex than patching smaller damage.

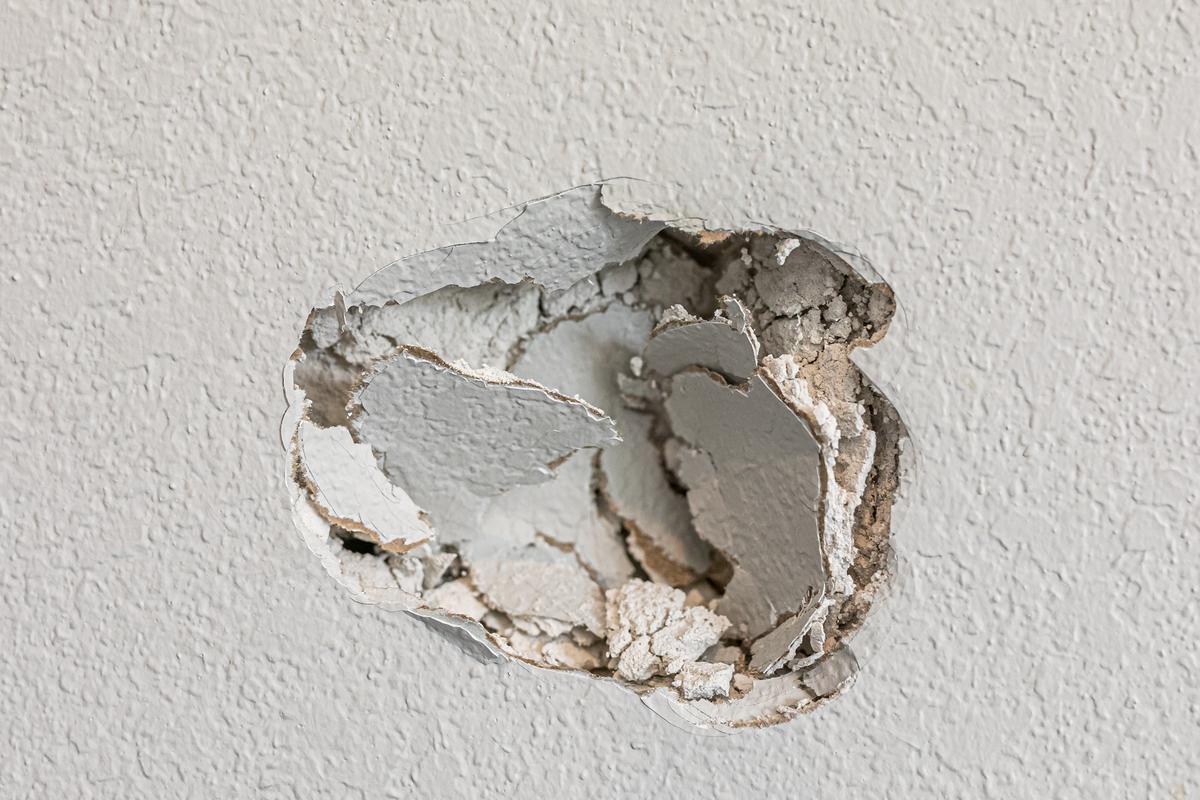
A damaged area that’s bigger than 6 inches will require forming a drywall patch with a different way of attaching it to the wall. This method of repairing drywall involves a couple of additional steps. If the damage is too extensive, however, you may want to leave it to the pros

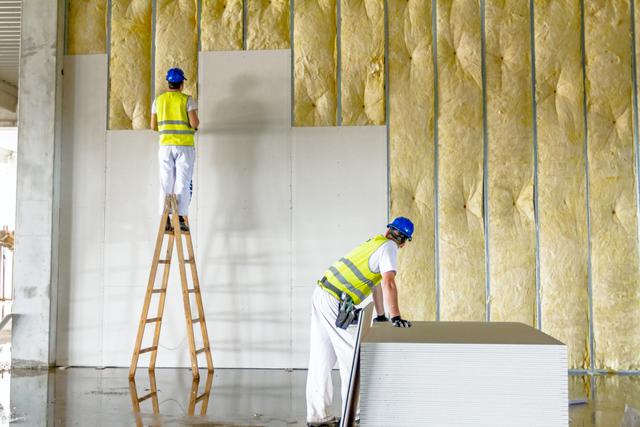
Cut a Piece of Drywall

The first step involves taking a piece of spare drywall and cutting it into a square. You’ll want the square to be slightly larger than the hole. 

Trace the Patch 

While holding the square patch over the hole, use a pencil to carefully trace around it. This outline marks where you’ll be cutting out the hole. 

Cut the Hole Out

Using a drywall saw, cut along the lines you traced in the previous step. Check if there are any electrical wires before you do the cutting. You wouldn’t want to create another problem while trying to solve the current one. 

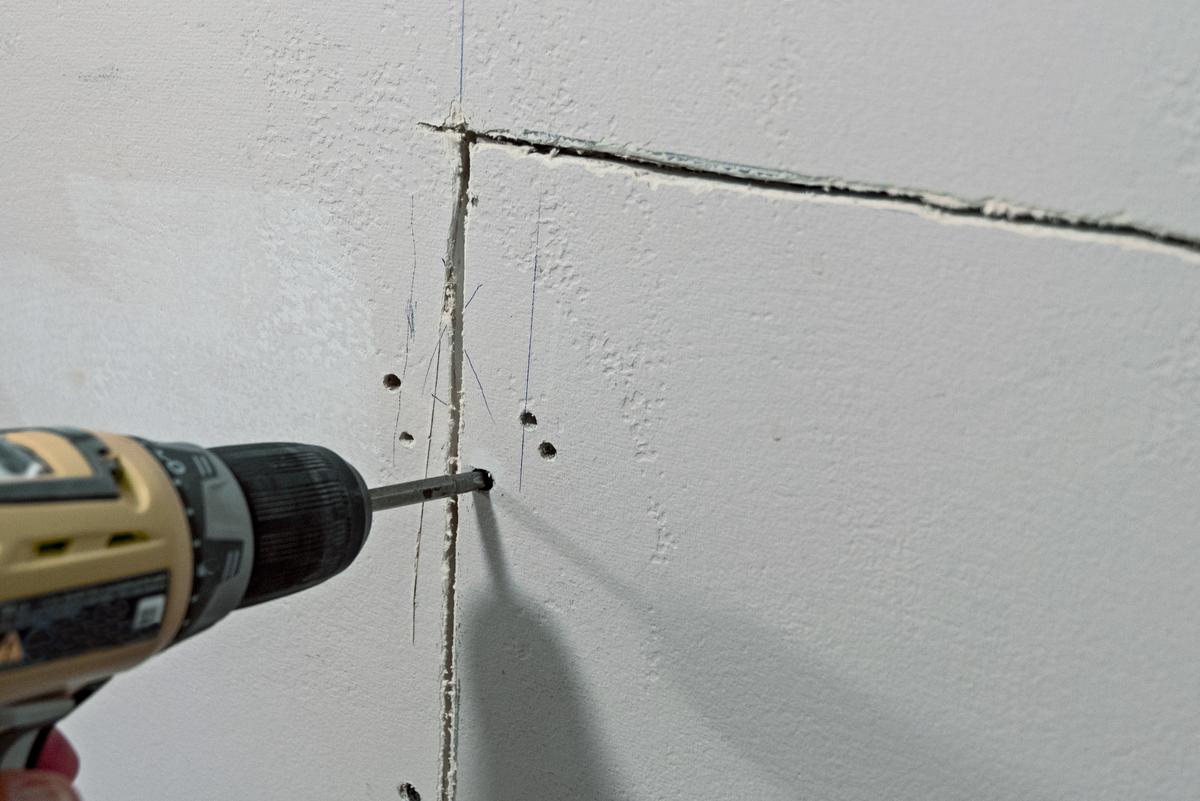
Place Furring Strips

Screw a furring strip — a small piece of thin wood — to either side of the hole on the inside. You may want to drive the screws beneath the drywall’s surface. 

Insert the Patch

Insert the patch of drywall into the hole you prepared, screwing it into the wood strips. As with the previous step of repairing drywall, make sure the screws sink beneath the surface. 

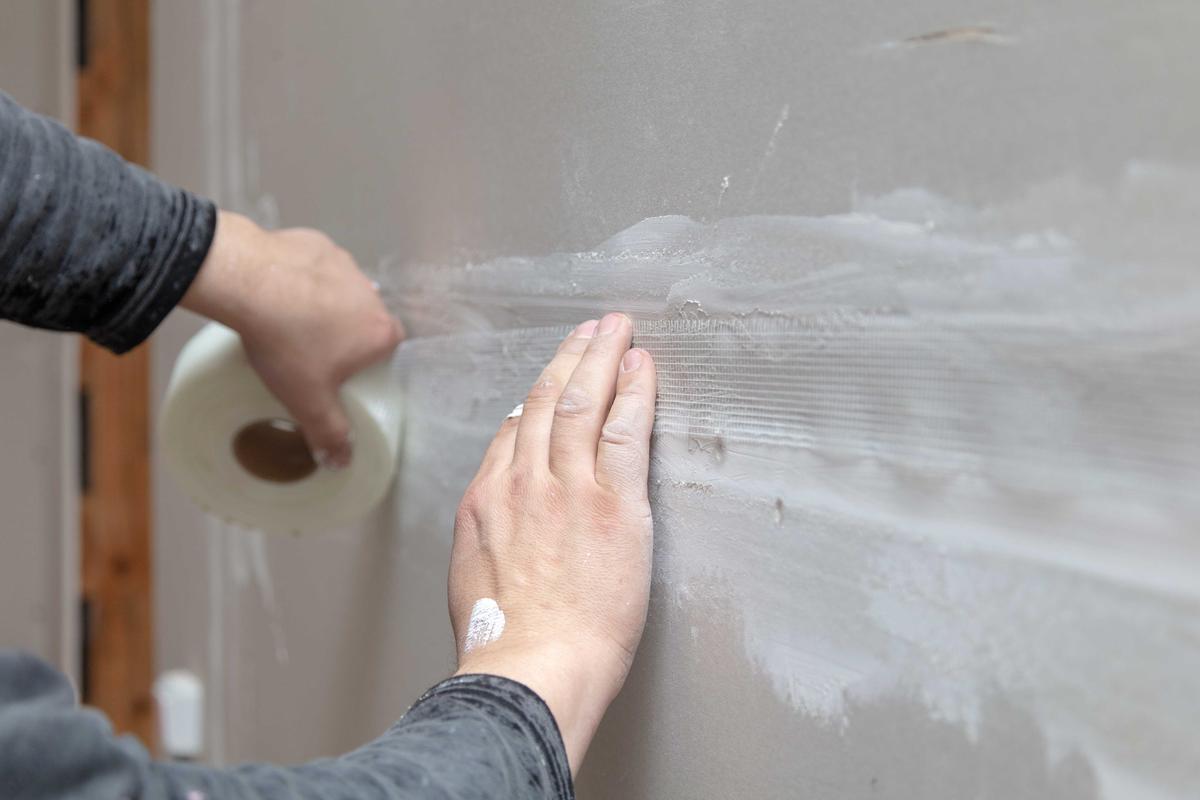
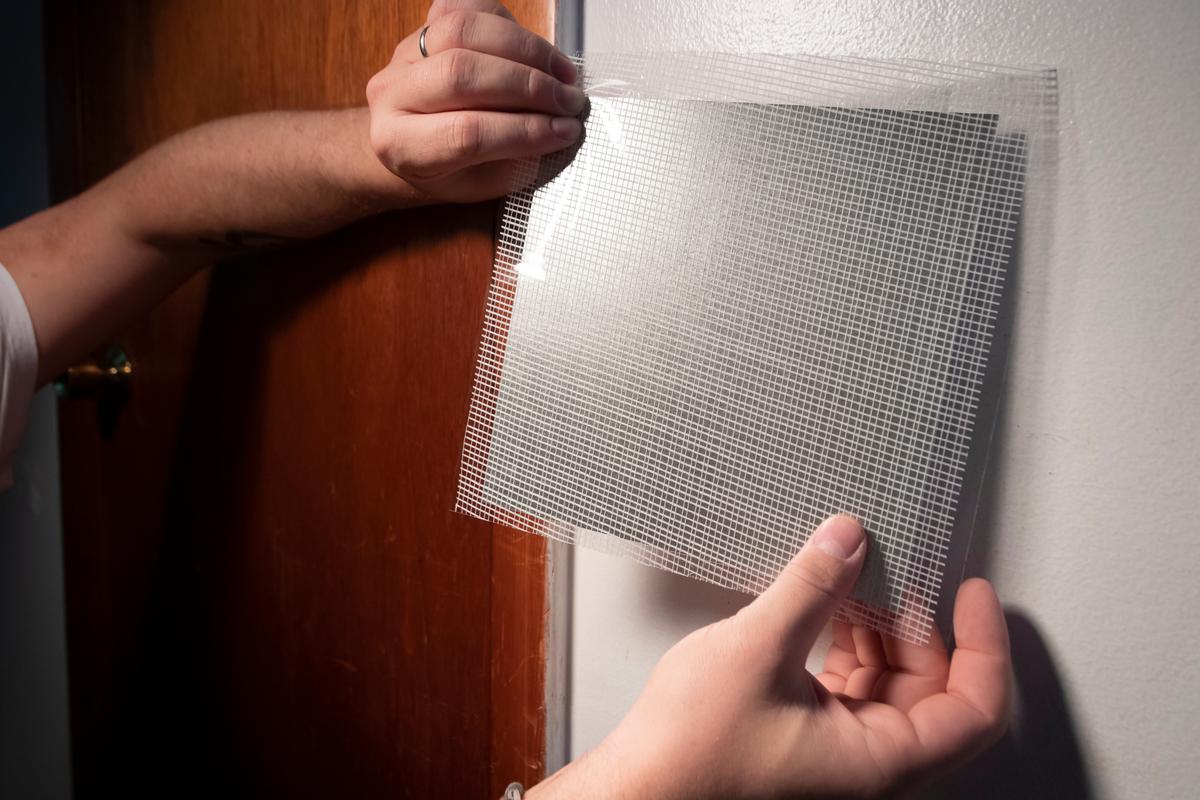
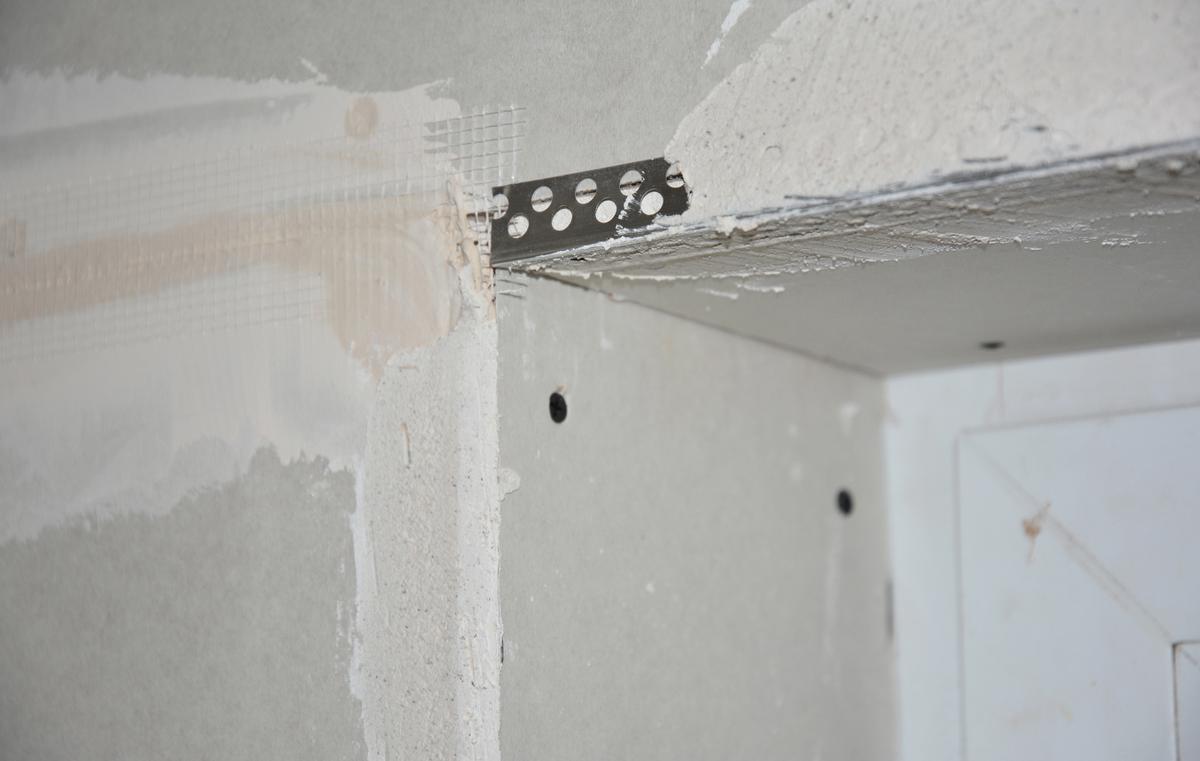
Apply Joint Tape and Compound

Cover the edges of the patch with joint tape. The mesh composition of joint tape allows it to reinforce the bond between the wall and the patch. This limits movement and helps in preventing cracks in the future. Apply joint compound onto the tape and the patch, blending the borders with the surrounding wall. In certain cases, you may need to apply a second coat of compound — after the first coat dries. 

Repairing Damaged Corners

Corner beads come in various materials including metal, vinyl, and paper.

Corner beads come in various materials including metal, vinyl, and paper.

While patching up a hole on a flat wall seems pretty straightforward, you may be wondering how to repair drywall on corners. Bear in mind that corners make use of corner beads to connect two sections of drywall. You can find corner beads in a range of materials including paper, vinyl, and metal. 

Cut Through the Corner

Cut above and below the affected area horizontally using a hacksaw. Remember to take the necessary safety precautions as you go about this step. Keep in mind that some of the tools and equipment you may use to repair drywall can be somewhat dangerous. 

Reveal the Damaged Bead

Using a utility knife, cut along the drywall vertically on the left and right sides of the cuts you made with the hacksaw. You should now be able to pull out the damaged piece from the corner.

Attach a New Piece of Bead

Snip a new piece of corner bead according to the size of the gap. Then, attach the bead to the revealed part of the wall with nails, adhesive, or fastener — depending on the manufacturer’s recommendations. 

Cover With Joint Compound

Coat both sides of the corner with a joint compound. Make sure to coat the entire bead patch in the process, covering the seams and smoothening the edges. You will also want to feather the sides as with other methods of drywall repair.

Finishing the Repair

Wrap up the drywall repair with a fresh coat of paint.

Wrap up the drywall repair with a fresh coat of paint.

The final step of repairing drywall is to make it seem like nothing ever happened. This step applies to each of the methods discussed above. 

Sand the Compound

Once the compound is dry, smoothen the surface by sanding it down. Make sure you oversand the compound to prevent the mesh tape from showing through. It can also be a good idea to use a wet-sanding sponge to minimize the amount of dust.

Prime and Paint

Apply a coat of primer onto the newly repaired area with a paintbrush. Once the primer is dry, apply two layers of paint — or more if needed — so that it matches the walls around it. Make sure the first coat of paint dries before going for a second layer.

If it’s been a while since the last time you painted the wall, this can be a great opportunity to go for a new paint job. Not only will it do a better job at concealing the patch, but a fresh coat of paint will also look more vibrant than the existing one. For a completely different appearance, it can be worth considering alternatives to drywall such as wood planks or plastic panels.

DS

Written by
Dikran Seferian

Written by Dikran Seferian

comments