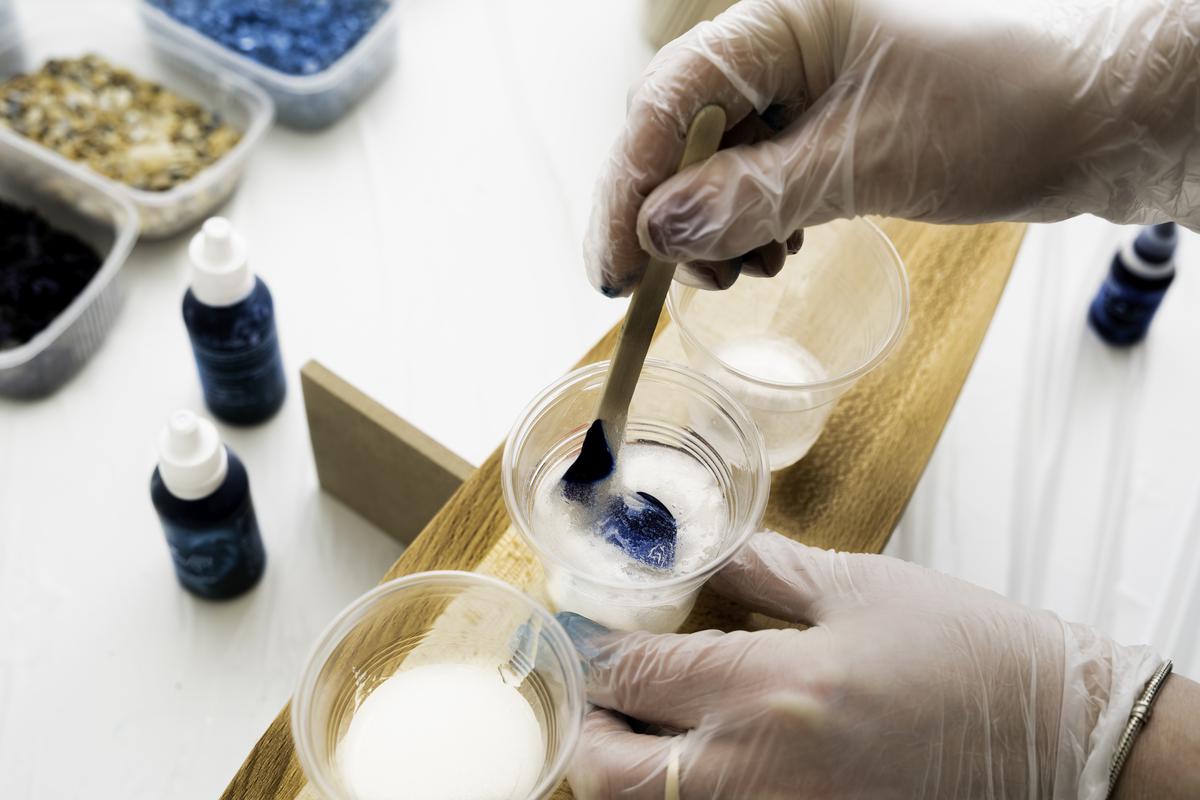
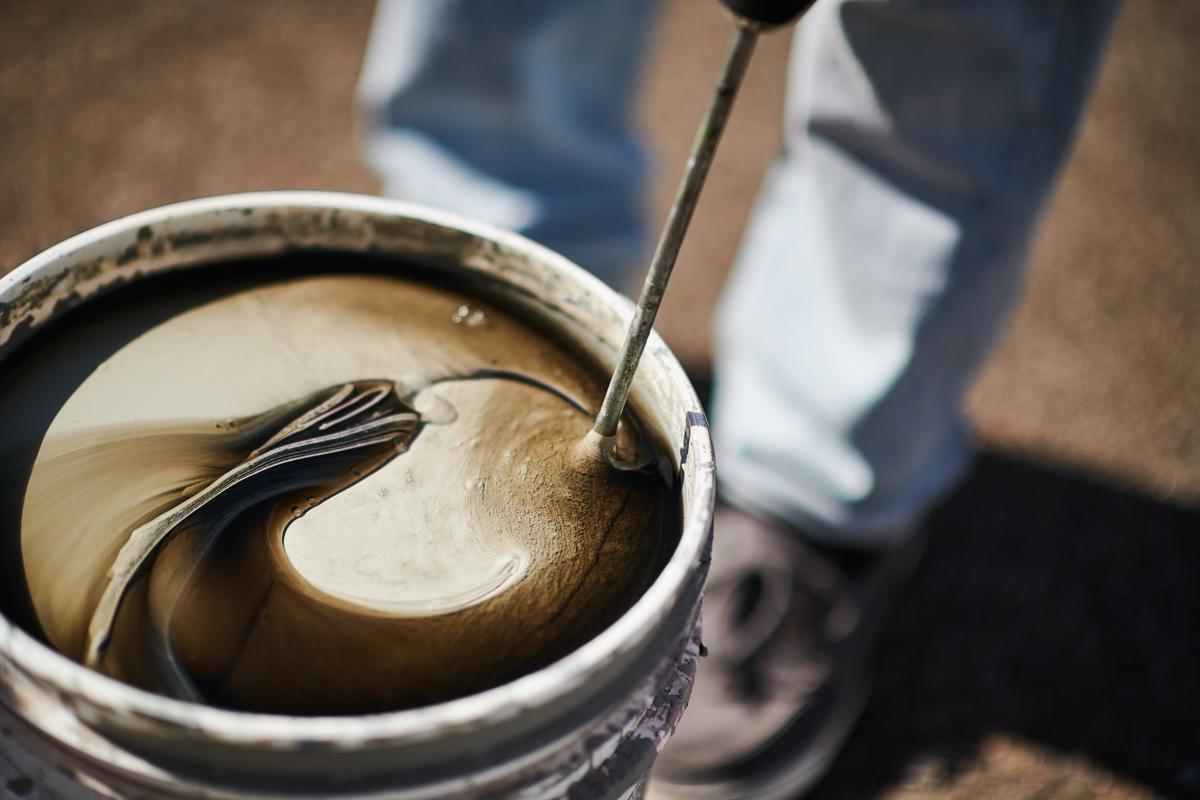
How to Make Your Own DIY Epoxy Resin Table

How to Make Your Own DIY Epoxy Resin Table

DIY
Small Projects and Repairs
By Mateos Glen Hayes January 24, 2022

Materials

Tools

  • A slab of wood, preferably high quality such as walnut, cherry, birch, oak, or pine
  • 3 gallons of epoxy
  • Colored dyes and pigments (your choice of colors)
  • Threaded inserts
  • Shellac
  • Finishing solution and coating solution
  • Mold release solution
  • Wood adhesive
  • Caulk
  • Circular Saw
  • Track Saw
  • Paddle For Mixing
  • Nitrile Gloves
  • Buffer
  • Torch (propane)
  • Router
  • Mixing Bucket
  • Orbital sander
  • Angle grinder 

Estimated Time To Complete

~ 4 Days to a week

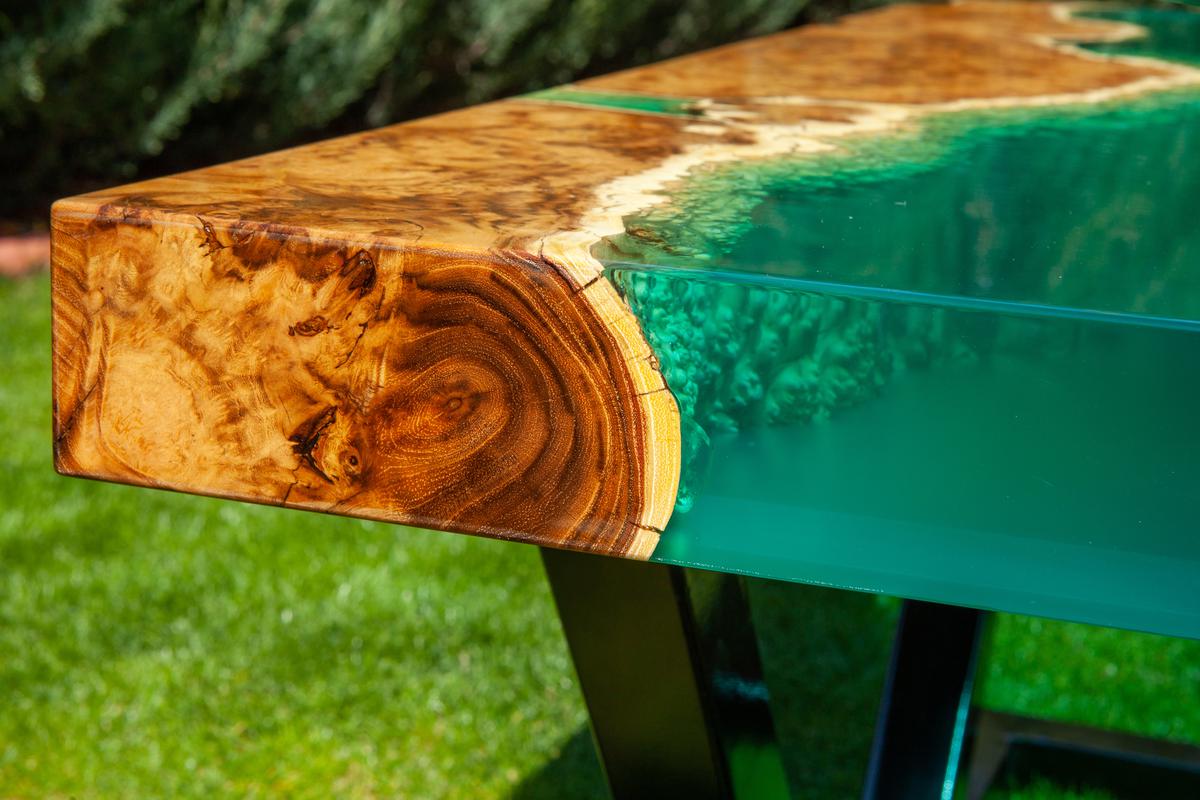
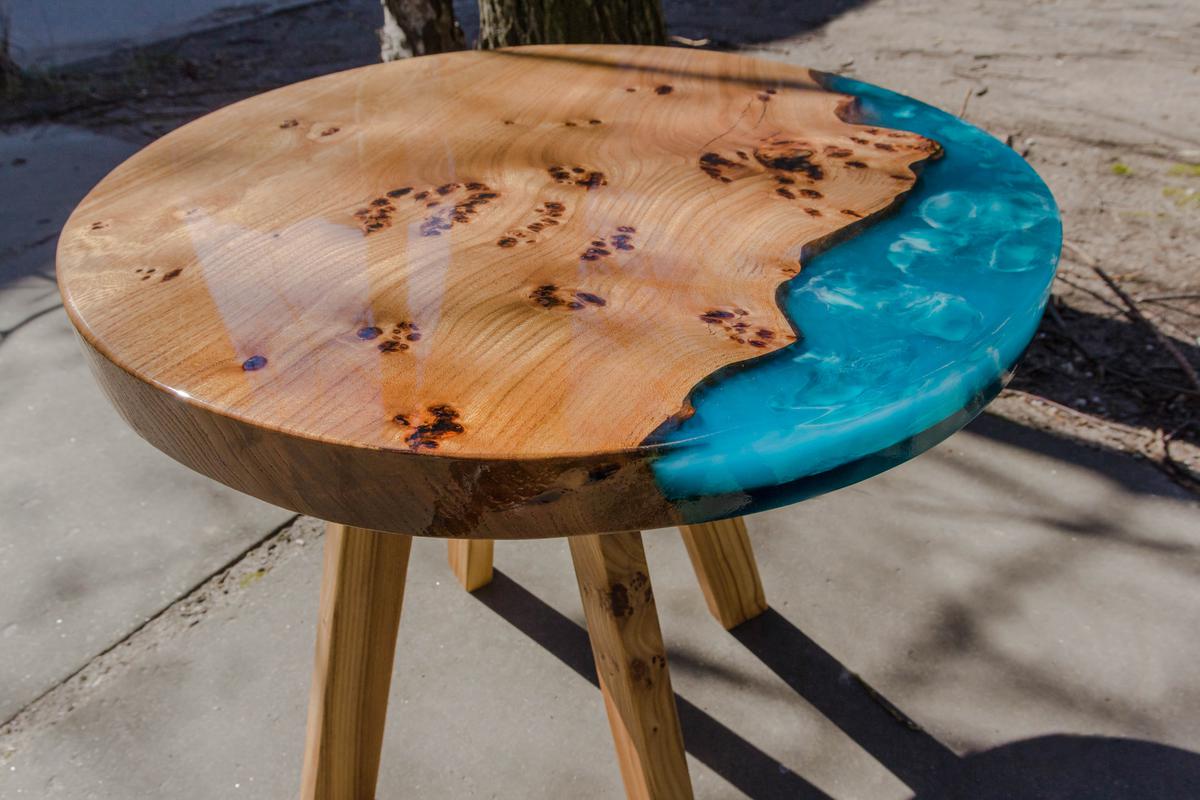
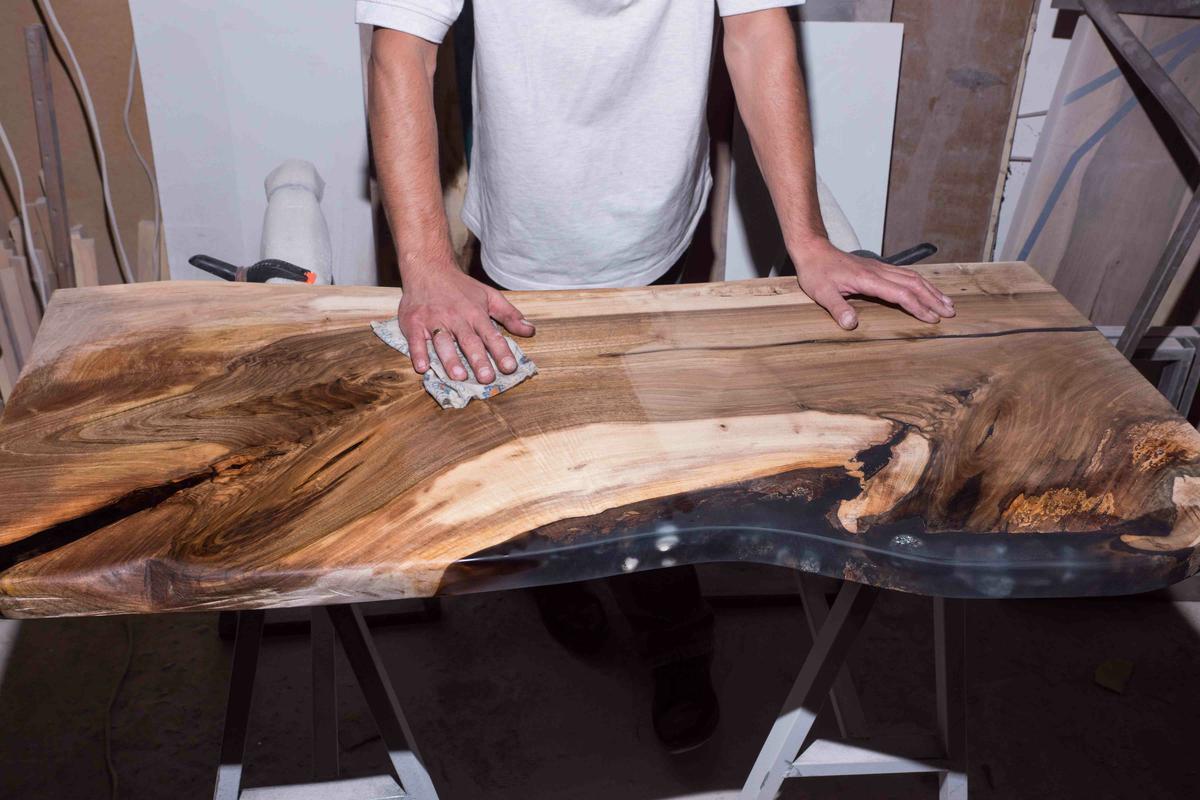
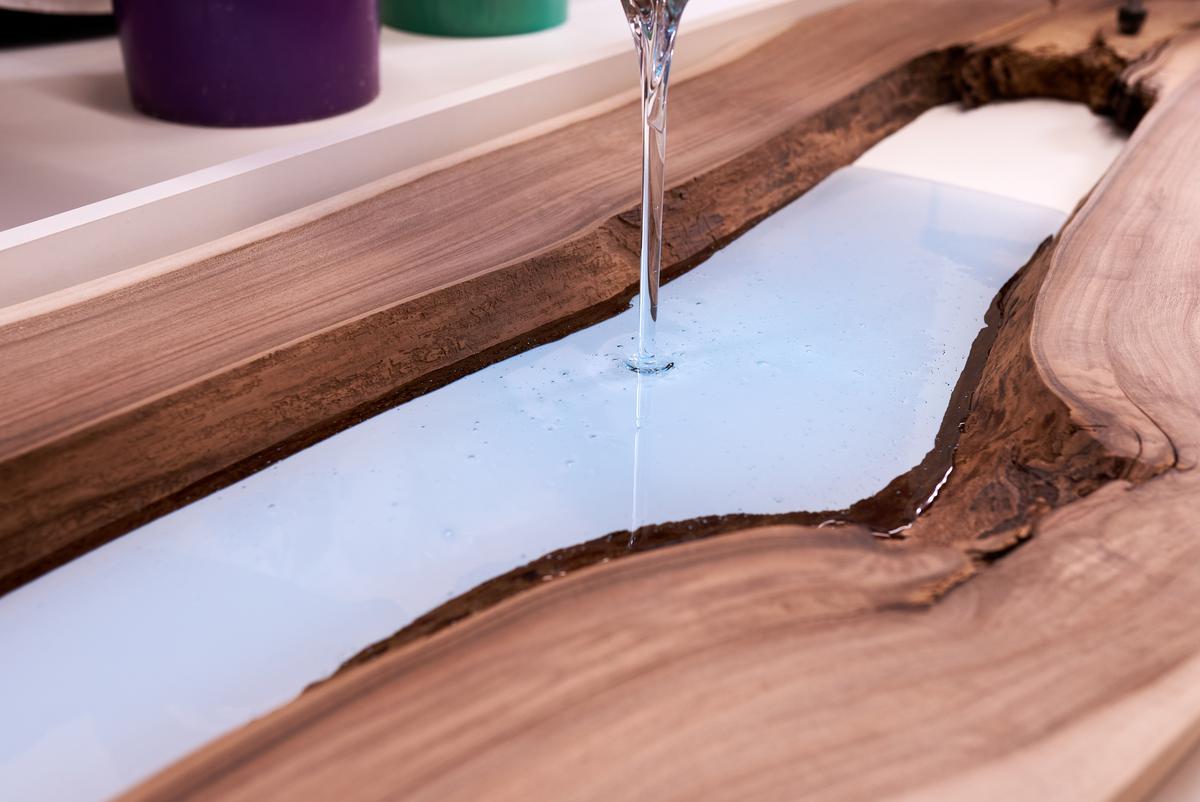
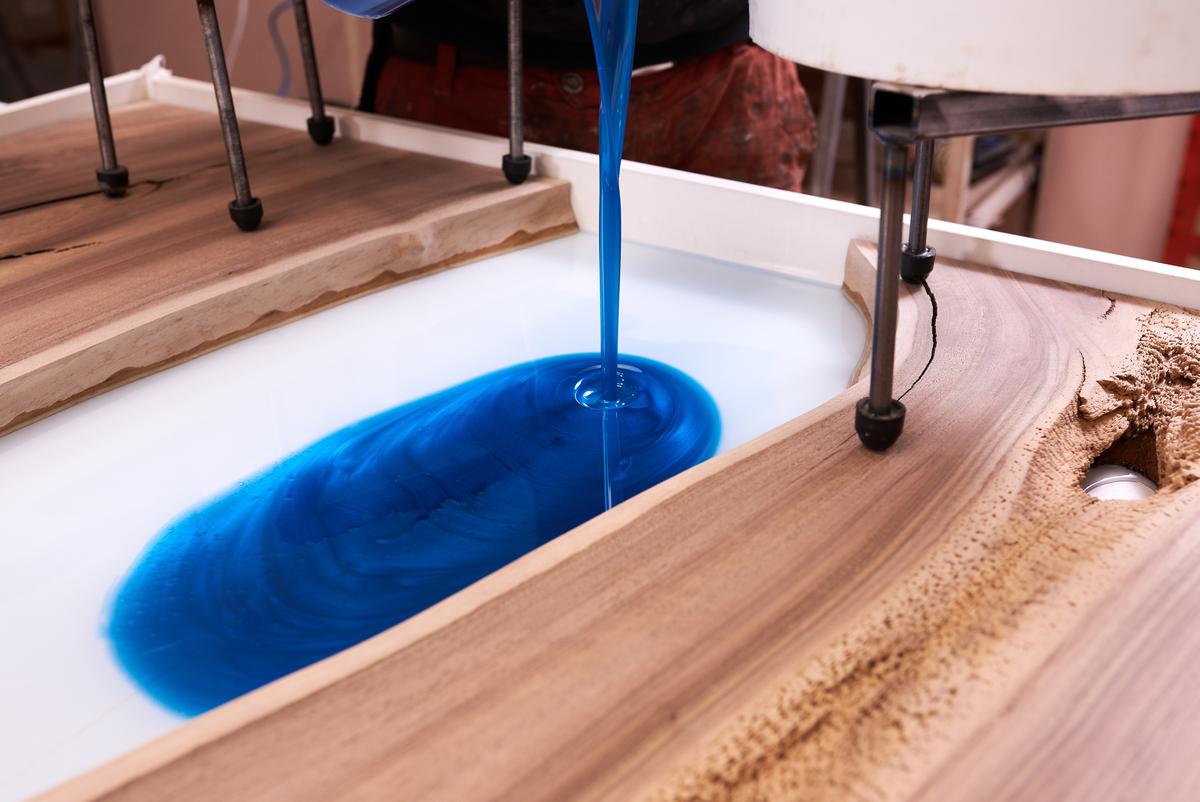
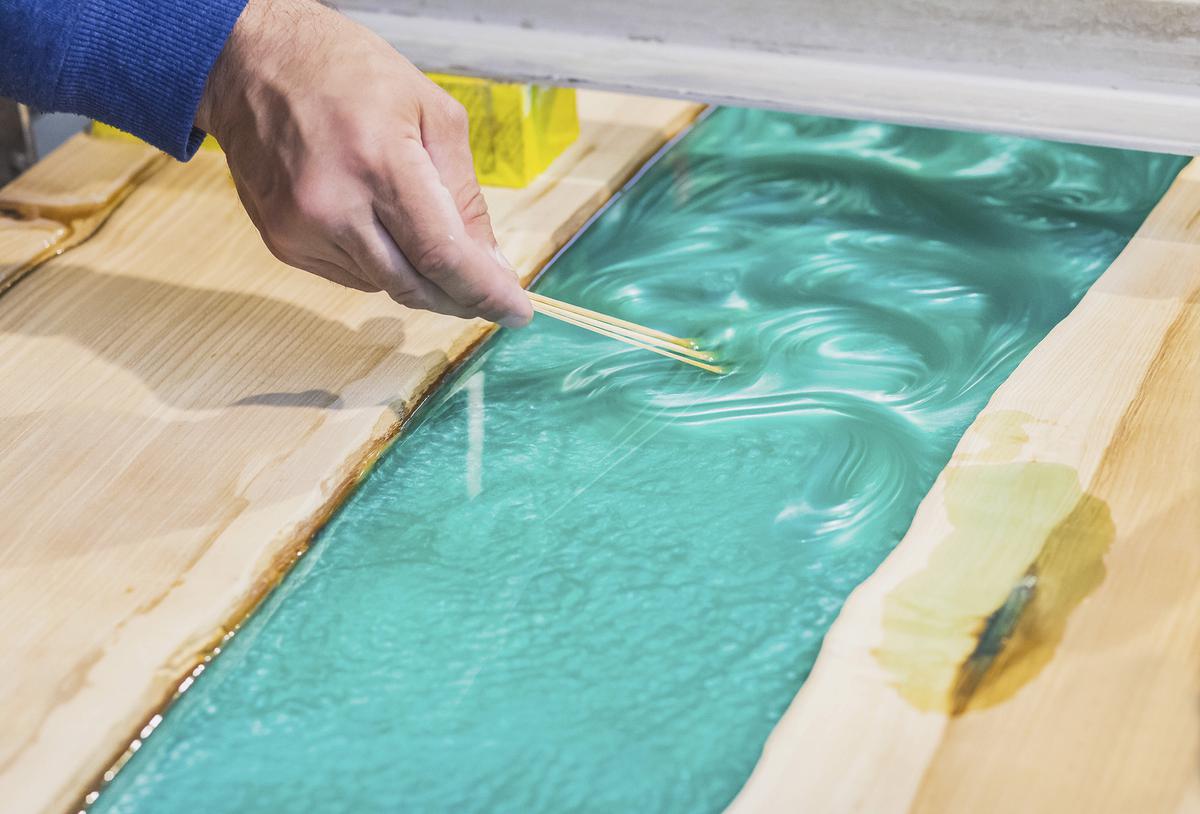
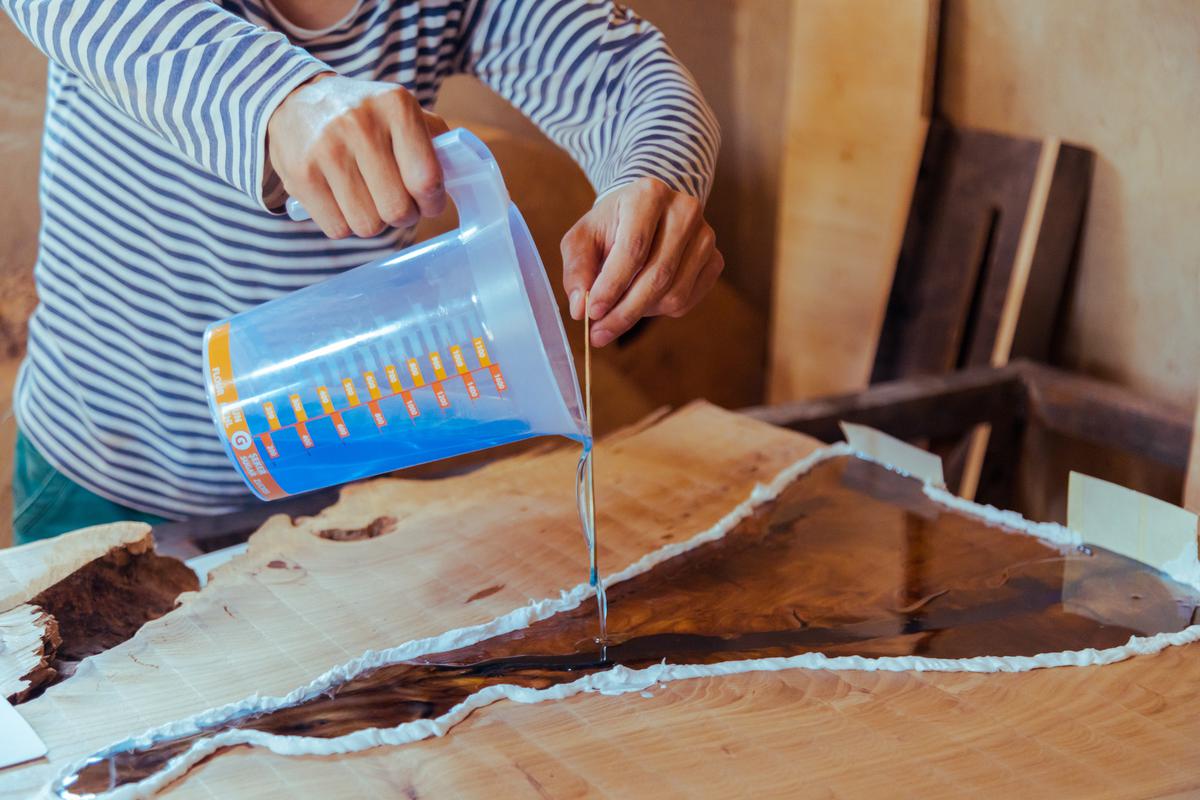
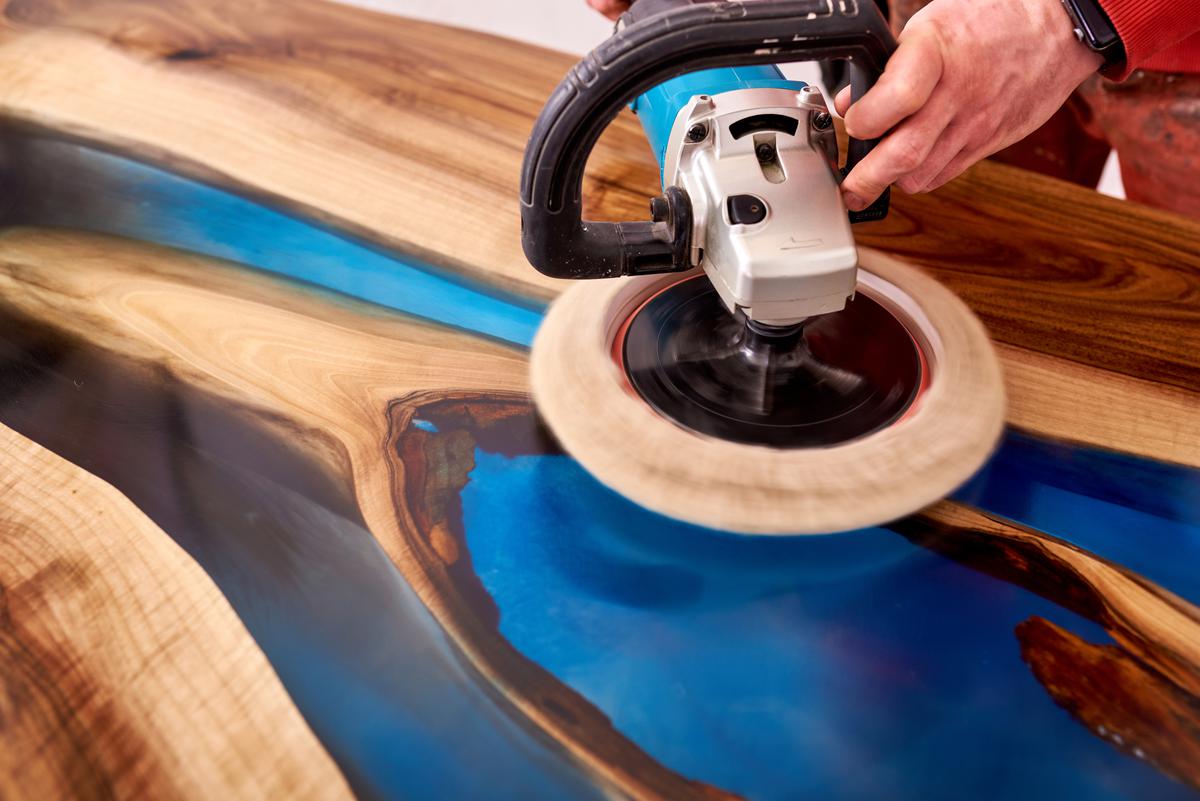
Before it fell out of style, epoxy furniture and decor were pretty popular and found their way into many homes. At the end of the 1900s, it was pretty trendy because it allowed the synthesis of “classic” wood aesthetics with retro-futuristic colors and shapes. It is fairly easy to make epoxy look like Mediterranean blue seawater, and this made for some very attractive designs. A lava resin table can also make for a strikingly unique design.

Get A Small Projects and Repairs Quote

Today, the use of resin to make unique epoxy resin furniture designs has made a significant comeback. The epoxy allows for a “traditional” design that uses centuries-old carpentry techniques but gives them an additional modern twist with a futuristic resin that dries in just under a day and can conform to any shape. It is certainly possible to build your own DIY epoxy resin coffee table, but it’s best to have a certain amount of carpentry experience before getting started.

Choose Your Resin Center Table Design 

Resin Tables Come in Different Shapes and Designs

Resin Tables Come in Different Shapes and Designs

The first step is one of the most important ones because it will decide a great deal of what comes next. First off, you need to select your wood slab. Oak, birch, and walnut are all great sturdy woods and can look really good after finishing. The next step is to select your resin timber table’s shape and design, meaning the area where the resin will flow through.

This is totally up to you, but the easiest way to go about this is to create a shape for the epoxy that is based on the natural curves of the slab itself. Building a river table is a popular choice since it makes for an authentic and ‘natural’  design. Plus, the shape of the wood’s curves gives the epoxy a channel to flow through. It also avoids an artificial look that would come from cutting a channel in the wood yourself.

Get A Small Projects and Repairs Quote

Prepare the Slab(s)

Clearing Away Deadwood Leaves You With The Highest Quality Slab Possible

Clearing Away Deadwood Leaves You With The Highest Quality Slab Possible

Once you’ve found the perfect slab and determined the design, that wooden slab will need a bit of prep work before it can be placed in a mold and have epoxy poured. First, you’ll need to cut the slab to the dimensions that are called for in your design. For best results, use a track saw as this will result in reliably precise cuts.

A circular saw will also work, as will a hand saw if you’re really short on power tools. At this point, you don’t need everything to be precise down to the millimeter in any case, since you’ll be doing some post-work once the epoxy has been poured.  

Get A Small Projects and Repairs Quote

Clean the Slab(s)

Some Sanding May Also Be Necessary to Remove Splinters

Some Sanding May Also Be Necessary to Remove Splinters

To make sure you get the most out of your slab, you’ll need to trim away the deadwood — literally. Look over your slab for any lightly colored spots, knot holes, and bark, and chisel out these imperfections. An angle grinder can also make cleaning the slab easier since it is much more thorough in removing softwood.

Getting rid of these imperfections is essential since any weak spots in the slab will make your table weaker. Soft spots can also cause problems once it comes time to pour the epoxy since rotting wood can detach, making it harder for the epoxy to set properly. 

Seal The Edges 

A Quick Drying Resin Will Prevent Dye From Staining The Slab

A Quick Drying Resin Will Prevent Dye From Staining The Slab

After chiseling away all that pesky dead wood and removing any unsightly knots, it's time to seal up the edges of the slab. Use a fast-drying resin to seal the parts of the wood you chiseled and to seal the edges of the holes left behind by removing knots.

Some people say you can skip this step, but it’s recommended that you don’t.  Sealing the edges of the slab will keep the dye you put into the epoxy from seeping into the wood. 

Build a Mold

A Band Saw Can Help Build a Mold Frame in No Time

A Band Saw Can Help Build a Mold Frame in No Time

The mold is a wooden frame that will hold your slabs in place as the epoxy is poured and keep the epoxy in until it dries. It is recommended that you use melamine, a type of plywood since it has a smooth outer surface and is pretty inexpensive. An ideal height for the mold is four inches since this will fit most slabs with room to spare. Be sure to caulk the edges of your mold so that nothing leaks out.    

Putting the Slab in The Mold

Once the Slab Is Properly Secured, The Epoxy Can Be Poured

Once the Slab Is Properly Secured, The Epoxy Can Be Poured

Before you stick the slab into the mold, you should consider adding an extra peel-away layer to the bottom of the mold so that the epoxy doesn’t stick. Tyvek tape is good for this purpose, although you can also use dedicated mold release sprays.

Once you’ve placed the slabs in the mold according to your desired layout, clamp down the slabs so that they don’t start floating when you pour the epoxy in. Some resin timber tables have “islands”, little round slabs of wood that will be in the middle of the epoxy flow. Use duct tape to hold these down and keep them from floating. 

Get A Small Projects and Repairs Quote

Prepare The Resin

Thoroughly Mixing The Epoxy Is Crucial

Thoroughly Mixing The Epoxy Is Crucial

Once you’ve chosen your preferred epoxy resin brand, you need to prepare it by mixing it in a bucket with a paddle. It is crucial that you mix very thoroughly with a plastic paint mixer, and scrape off the sides and bottom of the bucket with a wooden paddle.

Improper mixing can cause the epoxy to separate when it dries, and if you discover that the epoxy hasn’t been mixed enough after pouring it, you won’t really be able to correct it. Avoid mixing with the paddle near the top of the bucket as this can cause bubbles that are hard to get rid of. 

About Choosing Your Colors

The Epoxy Resin Color Is a Matter of Taste

The Epoxy Resin Color Is a Matter of Taste

At the end of the day, choosing your dye/pigment colors is all down to you. It’s a matter of taste and depends on what look you want to achieve. For instance, if you want to simulate the blue sea look mentioned previously, a good way to do that is to use a blue dye mixed with a pearl white one. This will add a shimmery quality to the blue dye that makes it reflect light in the same way as water does.

As you mix your color into the epoxy, be sure to check the color by taking a sample. An easy way to do that is with a clear plastic cup. This will help you to better see the color since a bucket will be too dark for the color to be fully visible.  

Pouring The Resin

Pour Slowly And Carefully To Avoid Bubbles

Pour Slowly And Carefully To Avoid Bubbles

For the best results, a two-inch maximum thickness is what you want to aim for with the epoxy. Any thicker can cause the epoxy to come apart and will therefore reduce durability. A’ thickness of 1.75 inches is even better as it will maximize the longevity of the epoxy.

To help the epoxy bind better to the wooden slabs, give them quick scuffing with sandpaper before pouring in the resin. As you pour the epoxy, be sure to do it slowly and carefully to avoid too many bubbles forming. 

Wait For The Resin to Dry

Swirl Periodically To Keep Pigment From Settling

Swirl Periodically To Keep Pigment From Settling

As the resin sits it will begin to solidify and retain its shape and texture. This will take place over 72 hours. If you use a pigment, you’ll need to periodically stir the resin lightly with a plastic knife to keep it all from settling at the bottom. Do this after 12 hours, and repeat after six hours if the pigments settle again.

If stirring leads to bubbles forming, you can use a blowtorch to remove them. However, be sure the epoxy doesn’t get hotter than 120F. It naturally heats up as part of the mixing process, but if it gets too hot it will crack and discolor.  

Remove the Resin Wood Table From the Mold

Caulking Can Be Used To Prevent Epoxy From Overflowing

Caulking Can Be Used To Prevent Epoxy From Overflowing

If you want the epoxy to be as hard as possible before you pull the slab out of the mold, it’s best to wait a week beforehand. To remove the slab from the mold, remove the sides of the mold and use wood wedges to help pop your homemade resin table out of the mold. Provided you put sufficient mold release, or used Tyvek wrap, the table should come out relatively easily. 

Finishing Touches 

Surfacing and Sanding Gives The Homemade Resin Table a Professional Sheen

Surfacing and Sanding Gives The Homemade Resin Table a Professional Sheen

With the slab free from the mold, it’s time for sanding and surfacing. A planer does a good job of smoothing out the surface of the slab and removing any imperfections that may remain. When it comes to the epoxy, use the planer to heat up the epoxy and then scrape the epoxy with a good scraping tool. For sanding, a rounder will give you a professional look for the edges of the table, and sanding gloves will do the job for the rest of the slab.

Get A Small Projects and Repairs Quote

MG

Written by
Mateos Glen Hayes

Written by Mateos Glen Hayes

None

comments