
Having spare time at home is always a great opportunity to get crafty. With a variety of DIY project ideas available, it’s hard to get bored. These include electrical projects that can effectively transform your living spaces. Certain ideas such as adding ice makers or ceiling fans tend to improve functionality whereas dimmers or outdoor string lights can add aesthetic value. It is also worth mentioning that electrical work is generally dangerous. But while maintenance tasks such as an electrical panel upgrade normally warrant a professional electrician, these projects can be DIY jobs that you can safely do on your own.
DIY
Electrical
By
Dikran Seferian
September 21, 2022
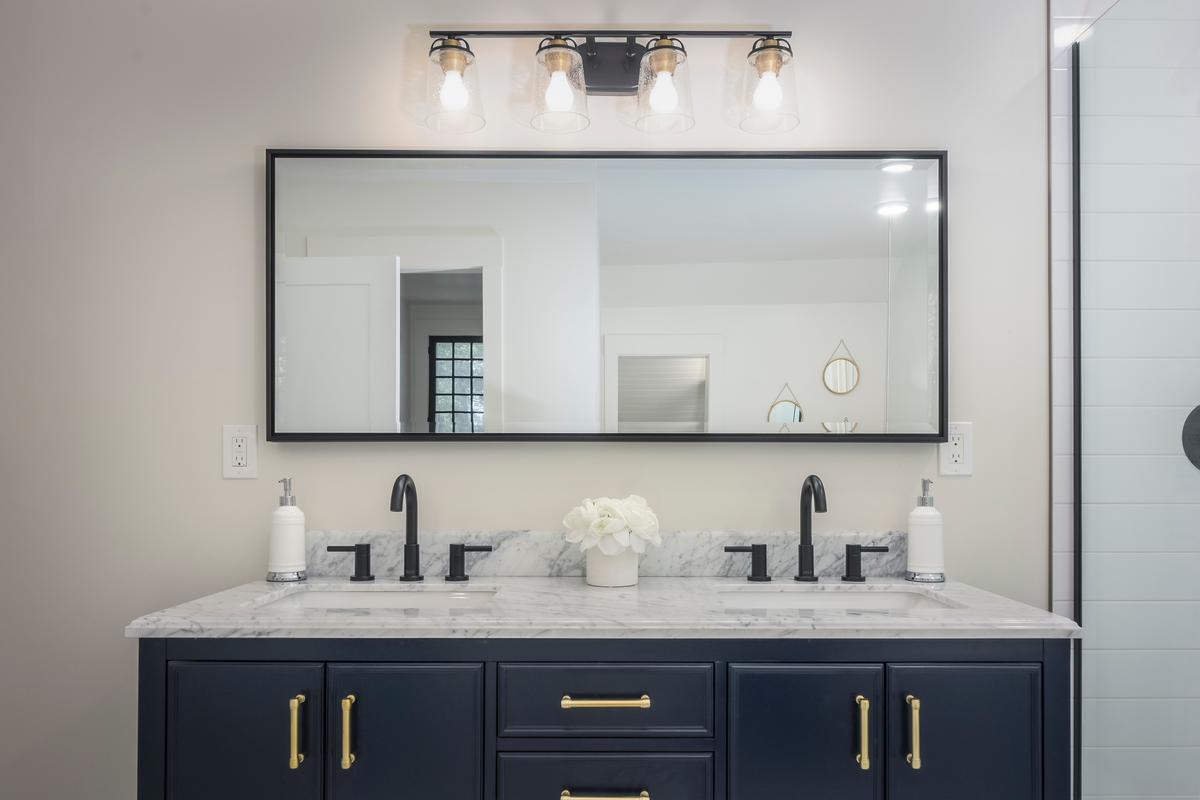
A new lighting fixture can do wonders in transforming your bathroom.
It may come as a surprise how much a brand new light fixture can transform a space. For instance, you can give your bathroom’s appearance a small yet effective boost by replacing the fixture and the bulb. And the best part about this project is that it’s pretty simple and straightforward.
After choosing a new option from your local department store, install it as per the instructions and enjoy the upgrade. If your budget doesn’t allow for this DIY electrical project, you can still go for a new look by painting the metal part of the existing fixture a bold color and just replacing the bulbs.
Installing Under-Cabinet Lighting
If your kitchen could use a little extra flair, one home electrical project you can go for is to install LED puck lights under the kitchen cabinets. The ambient lighting that the under-cabinet fixture provides also comes in handy when you want to grab a midnight snack.
After choosing the pucks and deciding on the placement, drill the holes under your cabinets accordingly and attach the lights using screws or mounting clips. Unless the pucks are battery-operated, you will need to plug them into each other in order to turn them on using either a plug or a light switch.
Installing a Video Doorbell
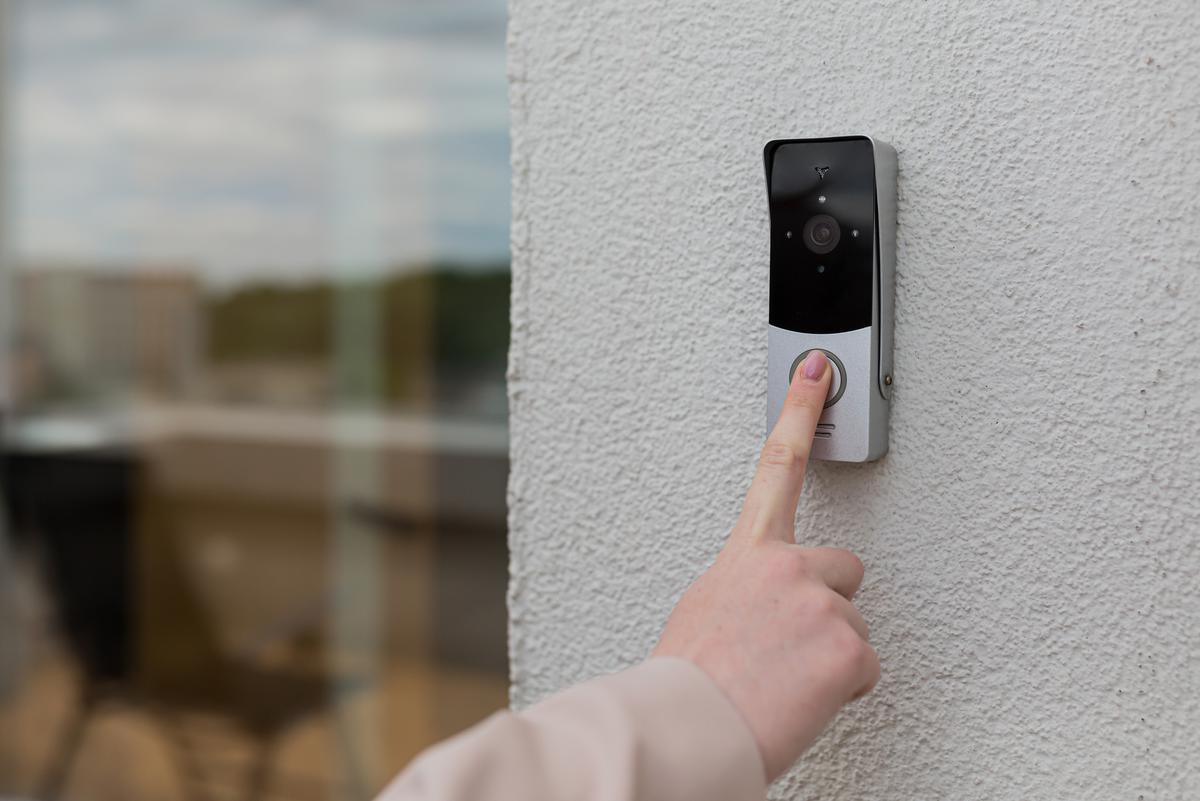
A video doorbell is a simple yet effective way to upgrade your home’s security system.
A video doorbell essentially allows you to see anything from guests knocking on your door to your package being delivered — even when you’re away from home. Battery-powered ones are especially easy to install. Simply pick out the option you prefer, charge the battery, and attach it to the door. Should you choose to go for a hard-wired video doorbell, make sure you know your way around electrical wires.
Illuminating a Bookcase With Strip Lights
LED strip lights are among the most popular and easy-to-install lighting fixtures you can find. And one great electrical project idea involving these clever inventions is to install them on bookcases — adding visual interest to your reading nook.
Before installing the strip lights, you’ll want to make sure the surface you’re adhering them on is clean and smooth. Next, simply unroll the strip to the length you need, pull off the adhesive backing, and stick it onto the underside of the bookshelves. When cutting the strips, make sure to do so in the designated sections. Once the lights are in place, connect the fixture to the controller and power adapter which goes into the electrical outlet.
Hanging Outdoor String Lights
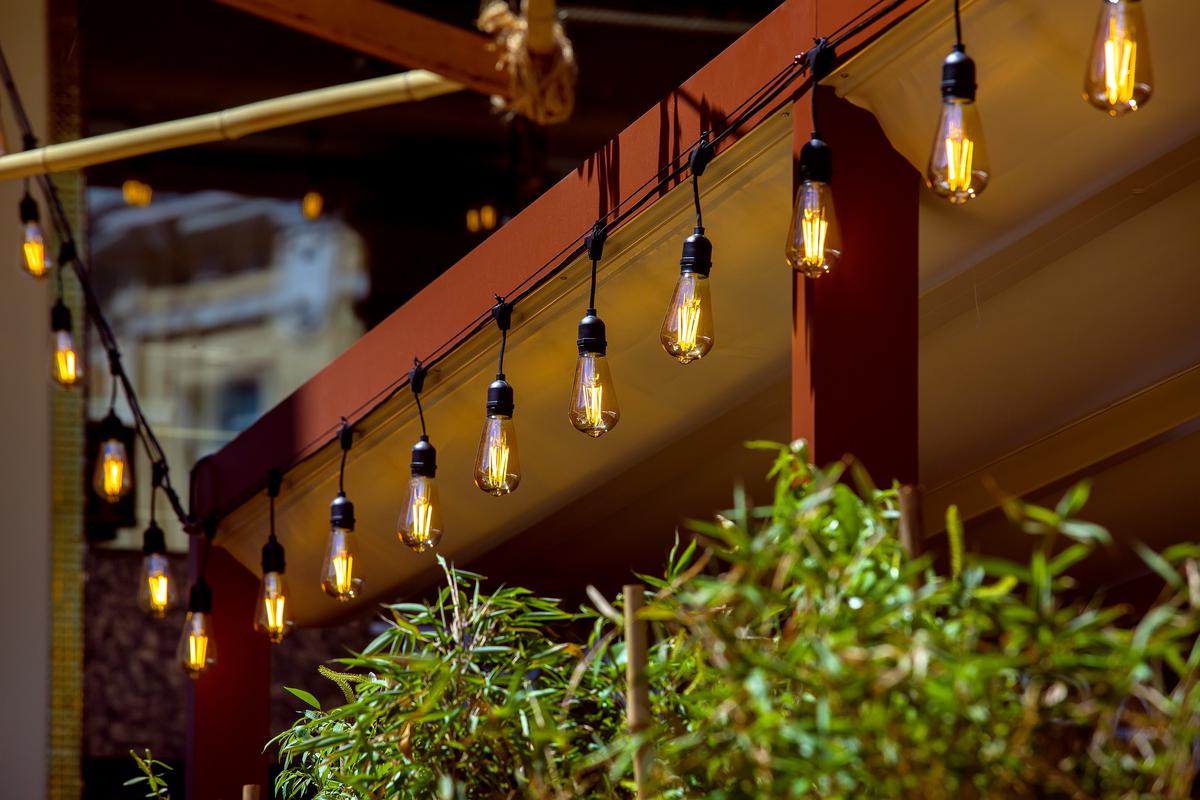
Hanging a set of string lights is a popular way to illuminate your outdoor living spaces.
String lights are a great way to transform your outdoor living spaces and set the mood for those patio dinner parties. This cool electrical project is as easy as it gets. After choosing the set of string lights and deciding on the exact placement, screw in some cup hooks accordingly and hang the string lights from the hooks using zip ties for extra stability. Next, plug the string lights in and enjoy your bright outdoor space. If your backyard doesn’t have places to hang the lights, string light posts should do the trick.
Adding an Ice Maker to the Fridge
Not all refrigerators come with a built-in ice maker. However, this added feature can come in handy anytime. And if your fridge is designed to accommodate an ice maker, installing one is a fairly easy electrical project — and can even add value to your kitchen. You’ll need an ice maker kit sold by manufacturers. The kit comes with a water supply valve, the tubing, and the hardware needed, as well as the ice maker unit itself.
First, you’ll need to unplug your fridge from the power outlet. Remove everything from the freezer including the shelves and the plastic access plugs and covers. On the back side of the fridge, there should be a sticker where you’ll install the water inlet tube. The next step involves cutting an “X” into it, bending it inwards, and pulling out the insulating plug. Then, connect the plug-in wiring harness in the freezer to the ice maker’s harness. Using the mounting screws, attach the ice maker and install the tray.
In the back of the fridge, run the water-fill tube into the hole you exposed earlier. Position the foam insulation over the tube, firmly pressing it in place. Next, make all the water tubing connections accordingly, connect the wiring harness of the water valve, and mount the valve to the frame of the fridge. Run a supply tube to the fill valve, plug in your fridge, and once the freezer is cold again, enjoy the continuous supply of ice.
Adding a Ceiling Fan

Installing a ceiling fan allows to you keep the indoor air circulated and your energy costs down.
One of the biggest favors you can do for your home is to install a ceiling fan. Besides the lighting feature, ceiling fans allow you to cut down on energy costs by serving as an alternative source of ventilation. If you’re comfortable enough with tools and you have a couple of hours to spare, taking on this electrical project shouldn’t be a problem. Make sure, however, to turn off the power to the lighting fixture before moving on with the process.
Start by removing the existing fixture along with the electrical box that’s inside the ceiling, and cut a new hole for the fan. Next, connect the new electrical box, adhere to the ceiling medallion, and mount the ceiling plate. The final steps involve assembling the components of the fan, connecting the wires, and attaching the blades and the lights.
Adding Solar-Powered Spotlights
Although solar-powered spotlights aren’t exactly electrical, they do count as lighting fixtures and they do help you save on electricity. These landscape lighting options basically come with photovoltaic cells that charge them up during the day. Best of all, installing solar-powered spotlights is a piece of cake — and much more convenient than running electric cables through your outdoor spaces. Simply shop for the spotlights you like, place them around your garden, and admire the instant transformation.
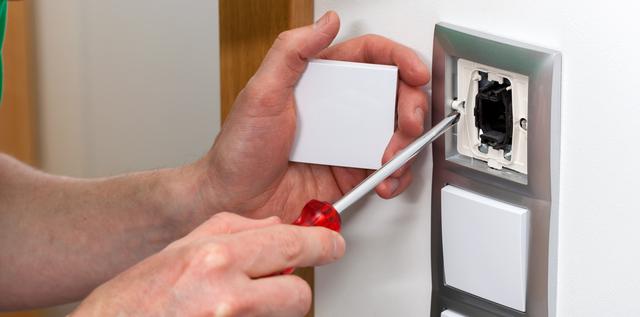
Installing Rotary Dimmers
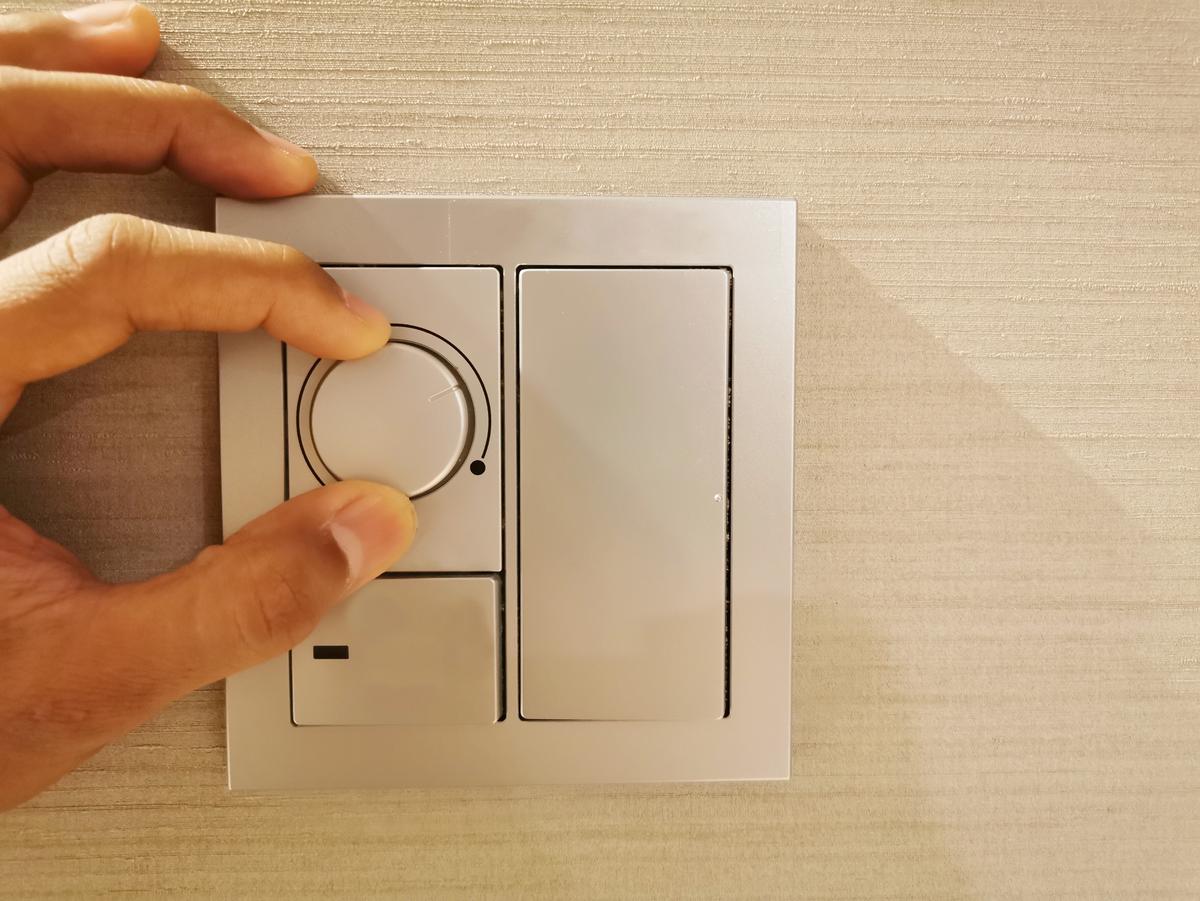
Dimmer switches are a great way to set the right mood in your living spaces.
Another cool electrical idea for your house is to install dimmers on your lighting fixtures. Dimmers in dining rooms, for instance, can recreate restaurant-quality lighting. With the right tools and a bit of precision and patience, you should be able to carry out this project on your own.
Before you begin, make sure to cut the power to the switch to avoid getting electrocuted, and flip the switch to the off position. This crucial step may also prevent other electrical problems that involve wiring.
Start out by removing the wall plate and the mounting screws, and pull the switch from the wall. With masking tape, mark the wires that connect the switch and unhook them. Strip the wires and connect them to the rotary dimmer accordingly. Then, simply tuck them into the electrical box and, using the mounting screws, fasten the dimmer to the box. Finish up by mounting the wall plate to the dimmer, securing it to the wall, and enjoy the instant atmosphere.

comments